
Knowing basic screen navigation in ABAP is very important to work easily with transactions. Let us discuss about the basic screen navigations like logon, change password, ABAP editor to code programs and logoff.
Logon -
Step-1: After installing SAP GUI, shortcut shown like below appears on desktop. Double click on the shortcut icon to proceed with the SAP GUI logon process.

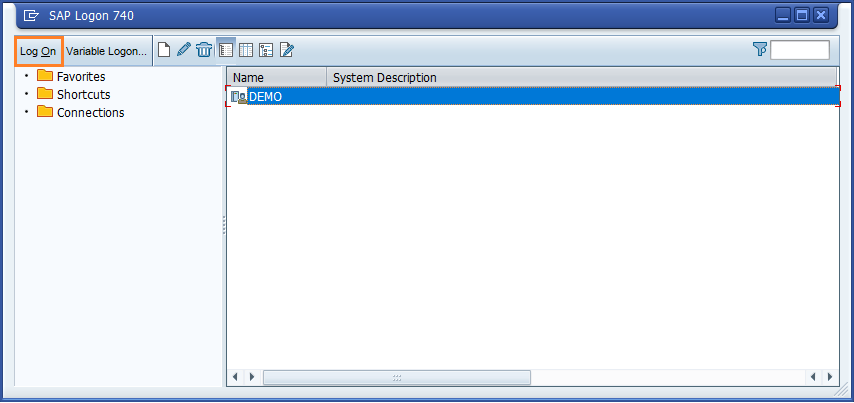
Step-2: From step-1, below screen gets opened. Click on the "Log On" button existed on top left corner that is highlighted in the below screen shot.
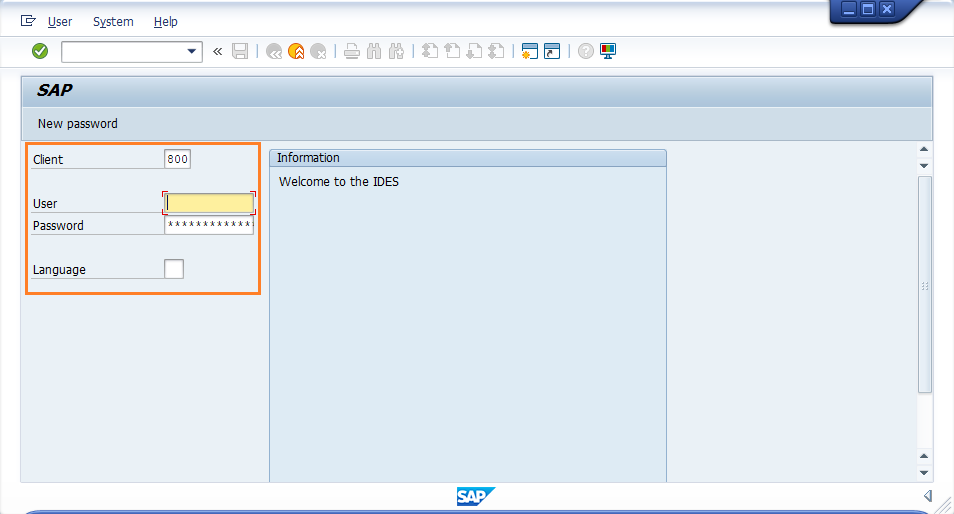
Step-3: From step-2, below screen gets opened. Enter the credential details(Client, User, Password and Language) and press "Enter" key to proceed.
- Client - Client number automatically populated by the system and is editable. If we want to login to the different client, we can modify the client number from default to other. Client number should not be blank in either case. (For example - 200,400, 800 etc. based on the configuration and provided by the administrator).
- User - Enter the userid details provided by the administrator.
- Password - Enter the password provided by the administrator or the changed password after first logon.
- Language - Language is an optional field. If we want to specify, enter the two character language code. For example - "en" for English.
Step-4: The below screen gets opened after the successful logon to the system.
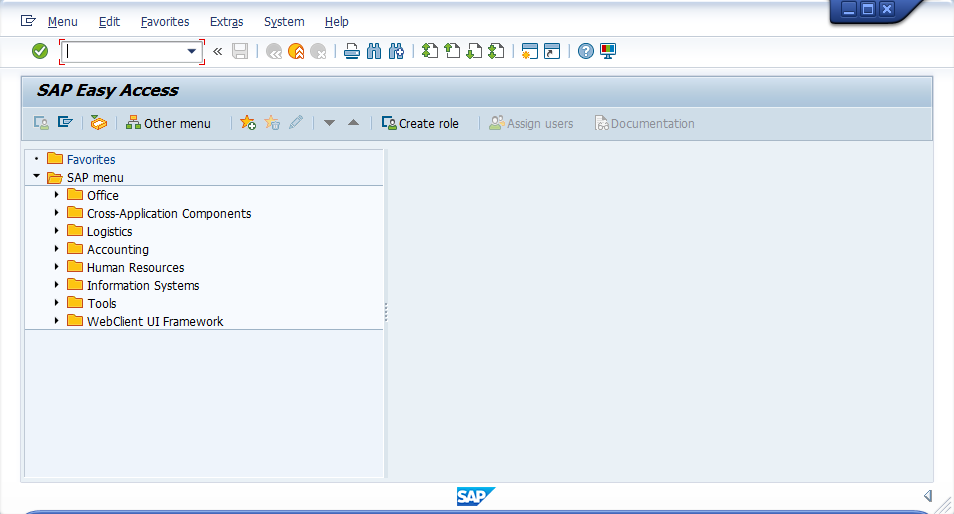
Once the "SAP Easy Access" screen appears, then we can assume that the logon is successful to the SAP system.
SAP Toolbar -
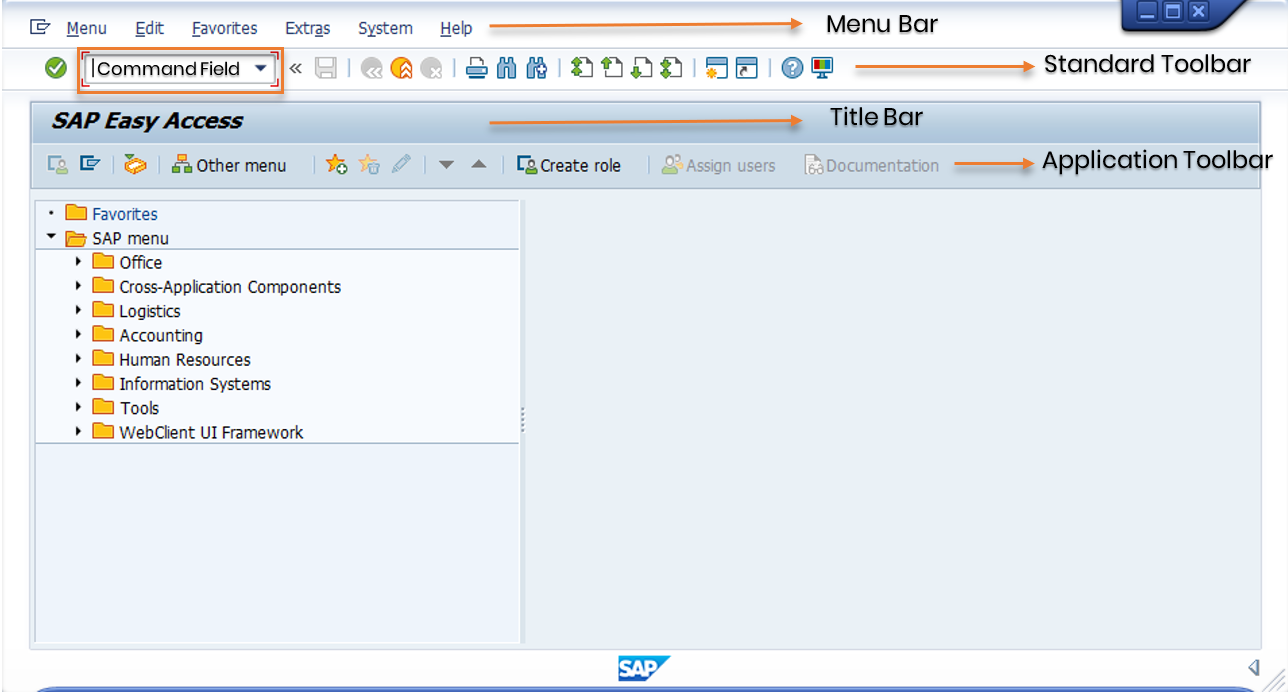
A different key options in the "SAP Easy Access" screen are explained and highlighted below -
- Menu Bar - The menu bar is the first on the toolbar with all menu options available.
- Command Field - Each and every process in SAP assigned to some transaction without navigating through the menu options. Command field used to enter the transactions to open the specific process.
- Standard Toolbar - Standard toolbar contains most of the standard functions along with the command field. (For example - save, logoff, print, find, find next, top of the page, end of the page, page up and page down etc,.).
- Title bar - Title bar has the information about the current screen where the user currently in.
- Application toolbar - Application toolbar having the application level menu functions.
Change password -
The password can be changed in two ways. They are -
- From logon screen.
- From the user profile.
From logon screen -
For example, let us assume changing the password for the test user "Pawan".
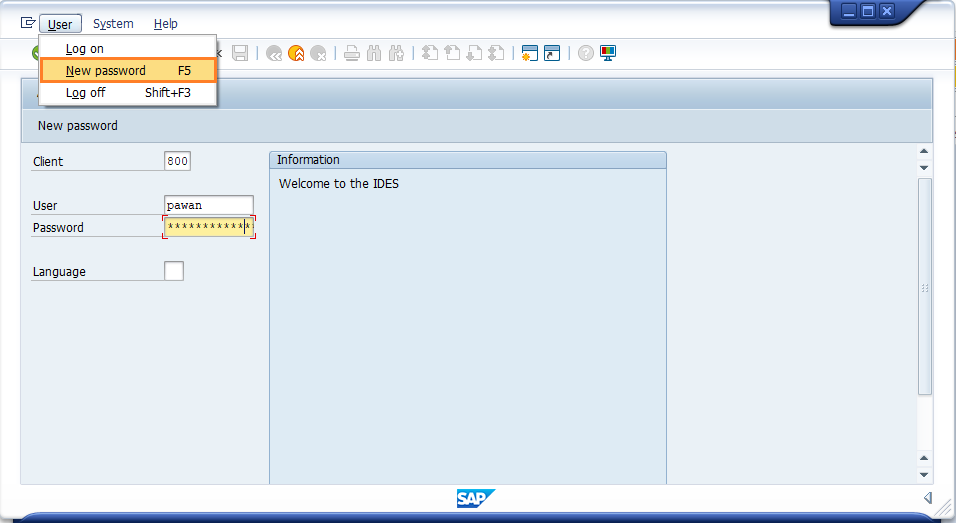
A dialog gets opened and prompts for the "New Password" and "Repeat Password" shown below.

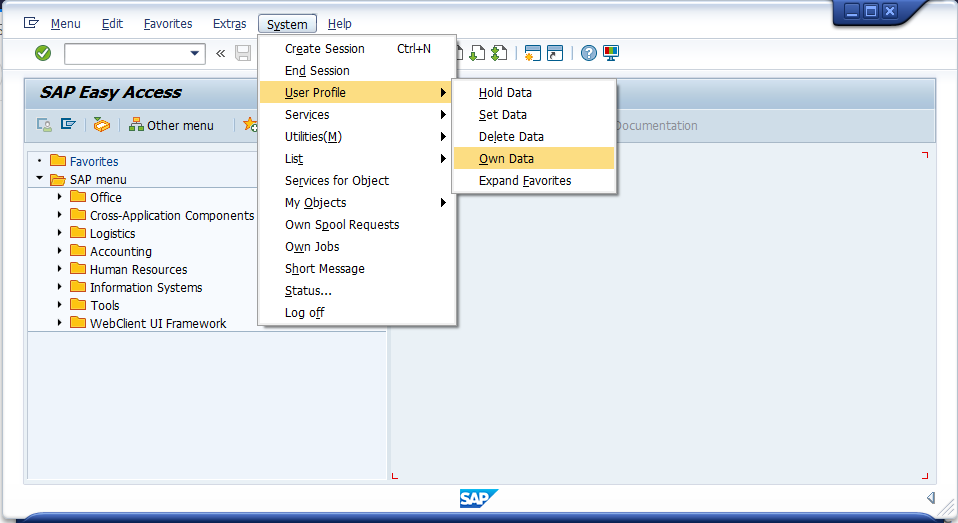
From the user profile -
For example, let us assume changing the password for the test user "Pawan".
Step-1: From "SAP Easy Access" screen Menu bar, navigate to "System User Profile Own Data".
Step-2: "Maintain User Profile" screen gets opened with all the user information. Click on the "Password" button highlighted under "Maintain User Profile" screen title bar.
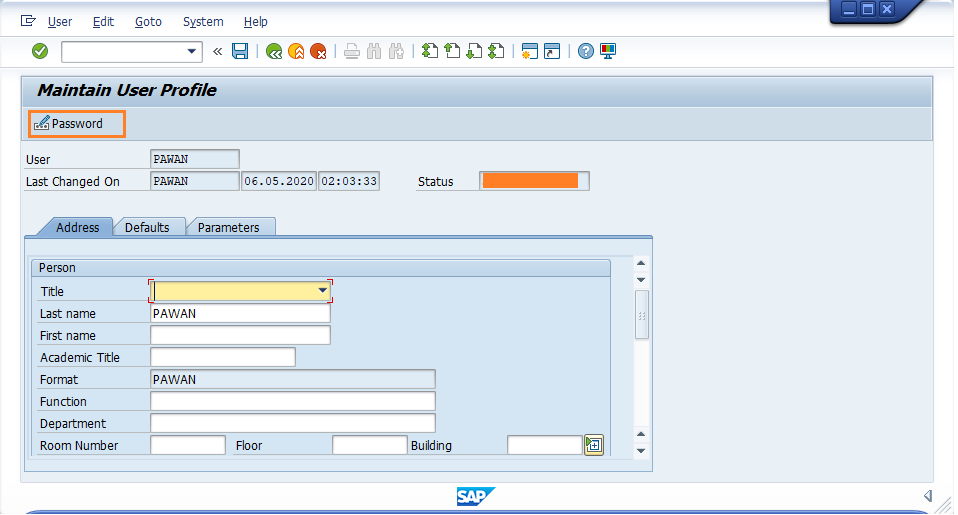
In the above screen, all the user information is available. Due to security issues, the data have been cleared in the above screenshot.
Step-3: "Change Password for User" screen gets opened.
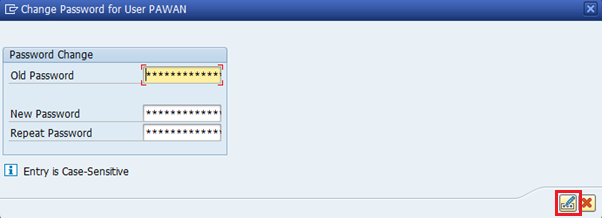
Enter the "Old Password" and "New Password", "Repeat Password" as prompted. And click on the  icon to successfully change the password or click on
  icon to exit without changing the password.
ABAP Editor -
ABAP Editor is more important to create/write ABAP programs. ABAP Editor can be opened in two ways -
- Simple ABAP editor (SE38) - Mostly used for stand alone program's development.
- ABAP editor from Development Workbench (SE80) - Used for project development in real time.
Simple ABAP editor (SE38) -
Step-1: SE38 is the assigned transaction to open ABAP Editor. From "SAP Easy Access" Screen, enter SE38 transaction in the command prompts and press "Enter" key to proceed.
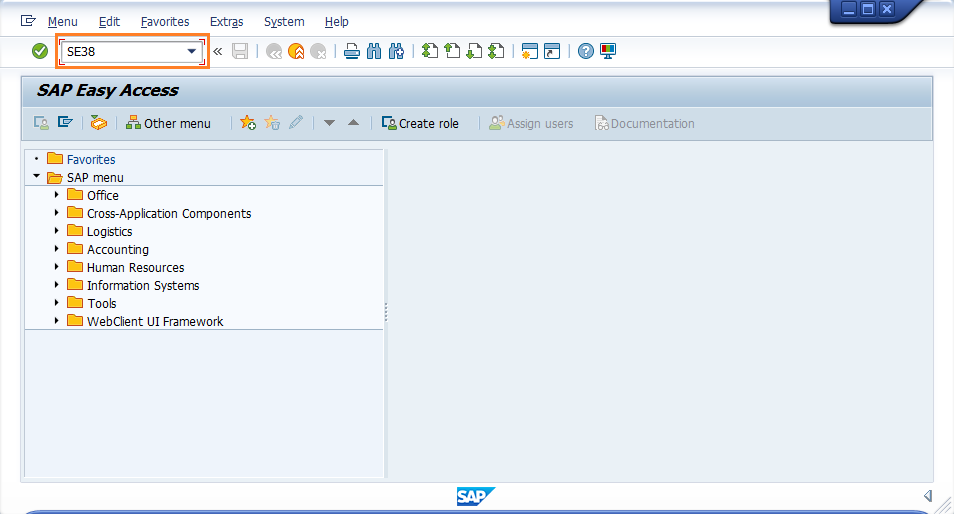
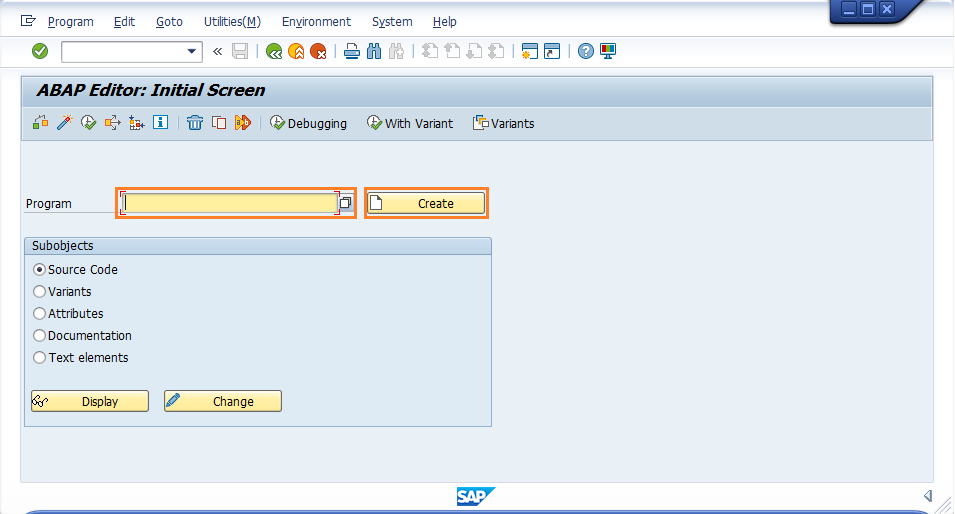
Step-2: "ABAP Editor: Initial Screen" gets opened. Enter the program name, select the subobjects and click on "Create" button to navigate next screen.
- Program Name - Enter the new program name. For Example - ZNEW99.
- Subobjects - Select the subobject based on the type you are going to create in the editor.
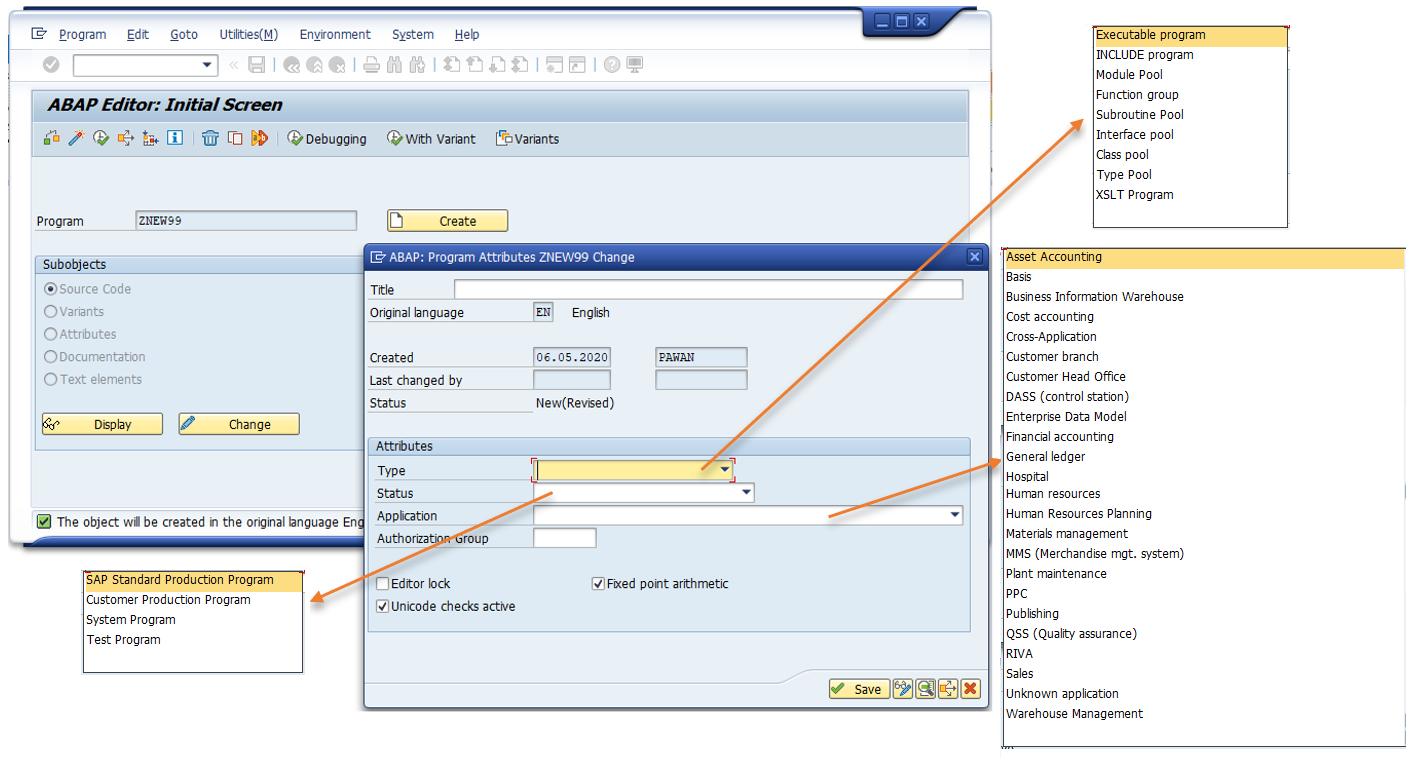
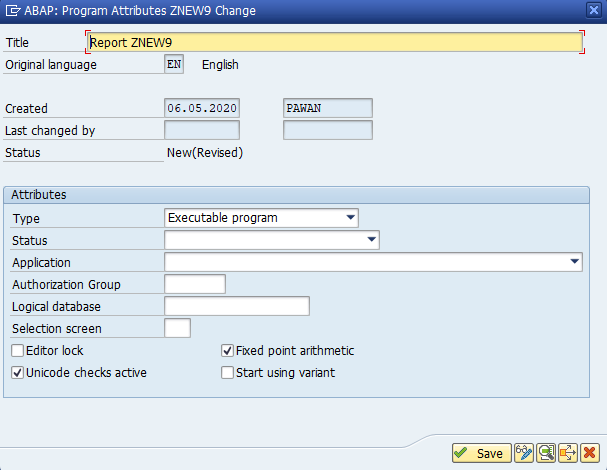
Step-3: From the step-2, "ABAP: Program attributes" dialog gets opened as shown below. Enter all the required information in the below fields and click on "Save" button.
- Title - Specify the title of the program.
- Type - Select the Type of the program from the dropdown list. For example - If the ABAP program is standard alone, we select "Executable Program" from the dropdown.
- Status - Select the program status from the dropdown where the program goes to.
- Application - Select the application name from the dropdown.
Step-4: A "Create Object Directory Entry" dialog gets opened. Enter the package information and click on the "Local Object" or "Save" button to open ABAP Editor.

If the module needs to be packaged, then use the package name that was created for production deployment. If the module is for practice, use $TMP as a package.
The ABAP editor for the new program get opens like below -

ABAP editor from Development Workbench (SE80) -
SE80 transaction assigned to open "Object navigator" of ABAP development work bench screen.
Step-1: Enter SE80 transaction in command prompt of SAP Easy Access screen and press "Enter" key.
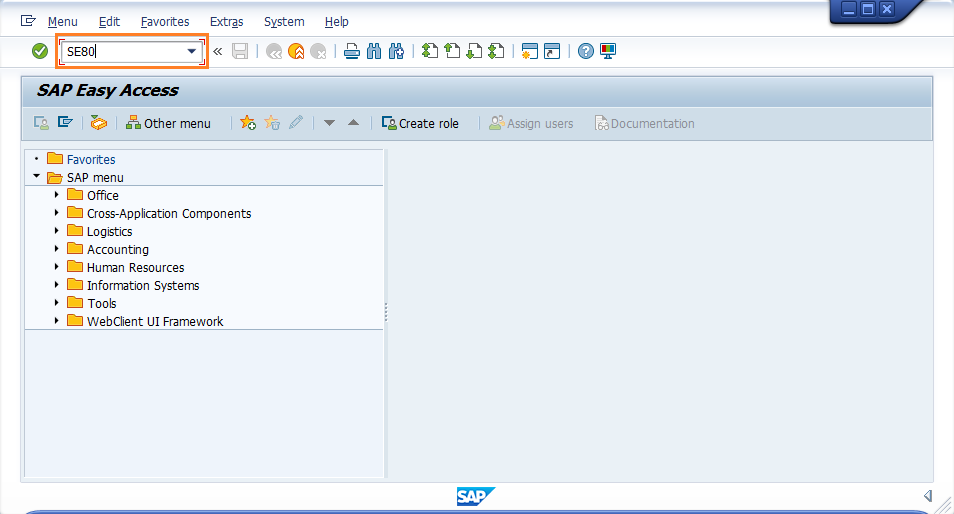
Step-2: It opens "Object navigator" of ABAP development work bench as shown below.
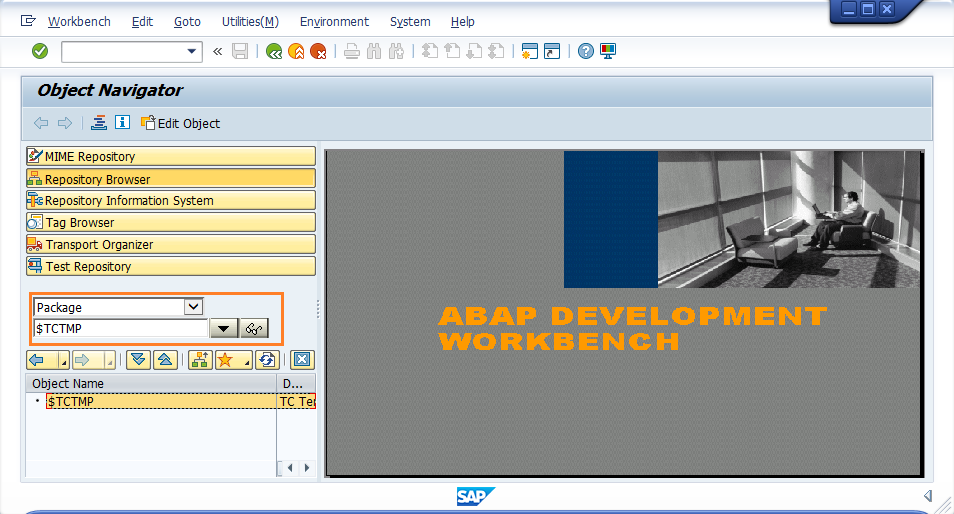
Step-3: Create/use an existing package to create the new program. Here, we use existing package "$TCTMP".
After the package created or using an existing package, right click on the package name and navigate to "Create Program".
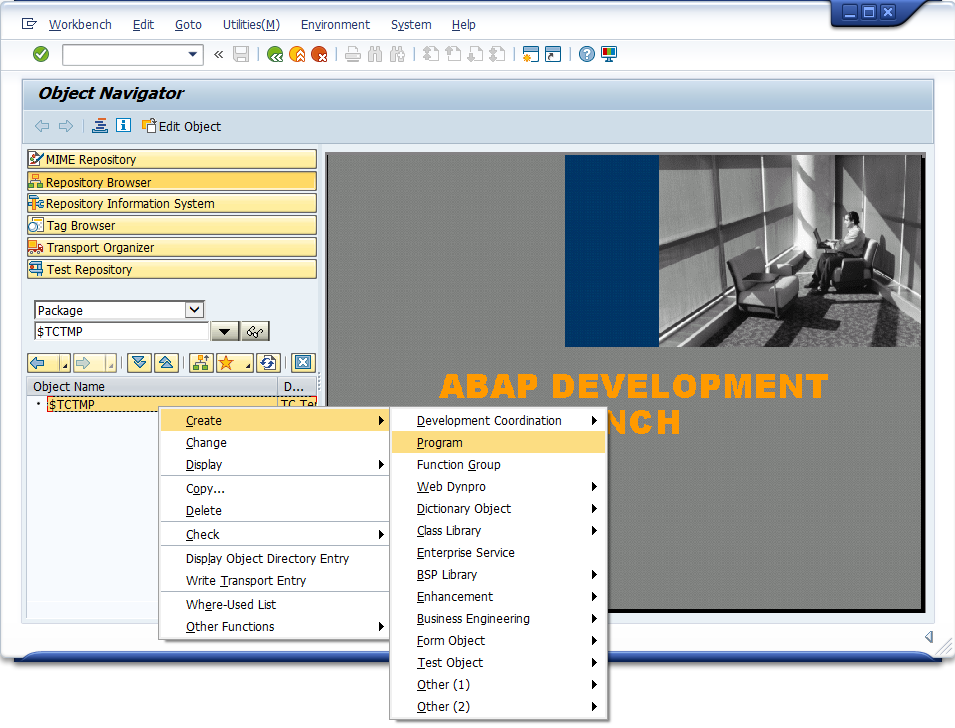
Step-4: A new dailog "Create program" gets opened and prompts for a new program name as shown below. Enter the "Program name" and click on "Continue" button.
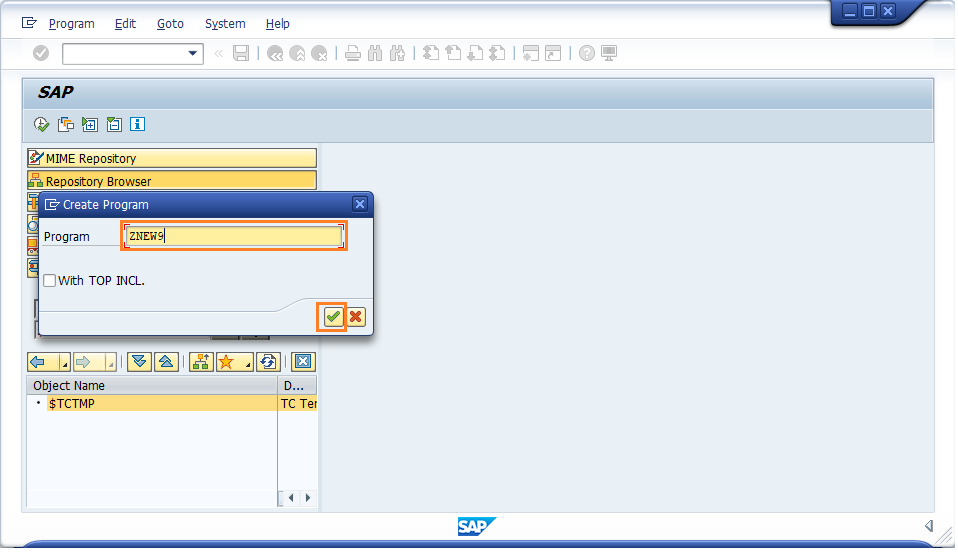
Now the below the dialog gets opened.
From this step, creating the program is same as explained in SE38 transaction process. Follow the SE38 transaction steps to get the ABAP editor.
Logoff -
It is a good practise to logoff from the SAP system at the end of the day after work completion. Logoff can be done in two ways -
- Using Logoff option from Menu Bar.
- Using "logoff" button or "(Shift +F3)".
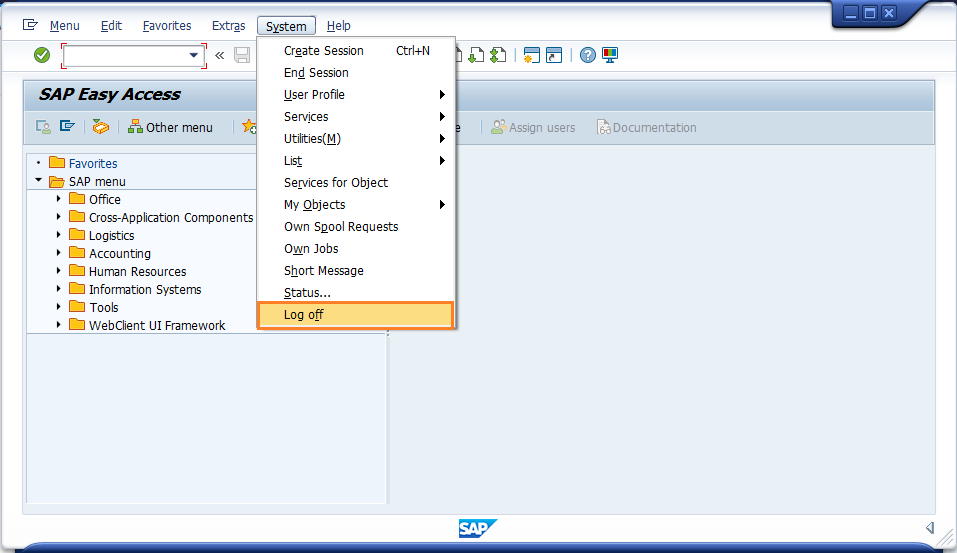
Using Logoff option from Menu Bar -
Navigate to "System Logoff", and click on "Logoff" to exit from the system.
Using "logoff" button or "(Shift +F3)"
Click on the icon highlighted below or use (Shift +F3) to logoff from the system.
