
Installing Python on MacOS
Python is a cross-platform programming language that can run on multiple platforms like Windows, macOS, Linux, and can be ported to the Java and .NET virtual machines.
To install the python on the local machine, get the copy of the Python standard distribution software from the Python Software Foundation website at https://www.python.org/downloads based on your operating system, hardware (32-bit or 64-bit) and operating system version of your local machine.
As of writing the tutorial, the Python current version is 3.8.3. However, always check the latest version and install it.
Installation Procedure –
MacOS comes with Python 2.7 preinstalled and that is pretty much outdated. We need to update the Python to the latest version and below are the step by step procedure to install it –
Prerequisites –
- User should login as an Administrator to the MacOS.
- User should have the information about current system hardware chipset (64-bit or 32-bit).
Step1 - Download the Python 3.8.3 Installer
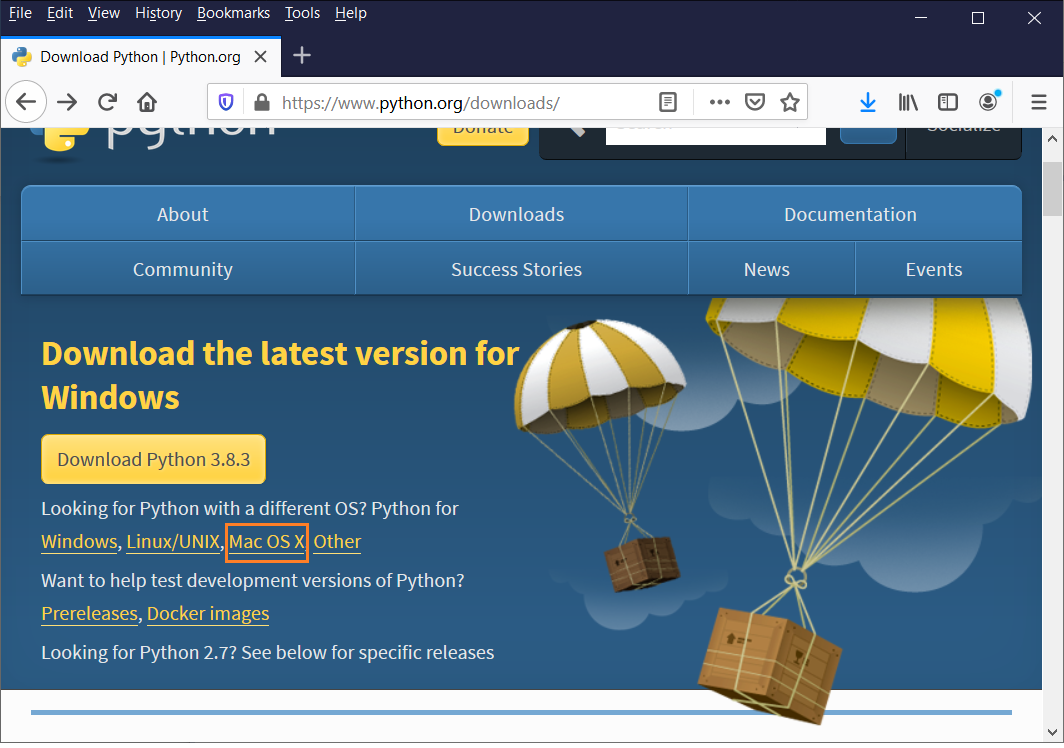
Open the browser an navigate to https://www.python.org/downloads page.

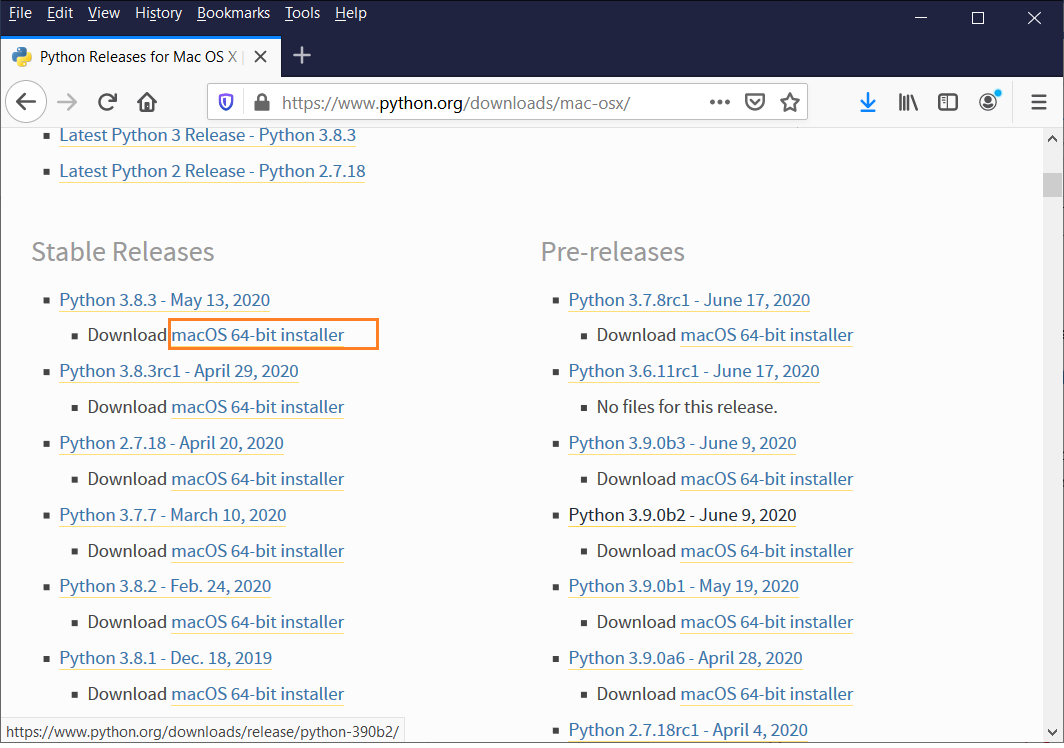
Click on the “Mac OS X” (Current MacOS version) to go to the “Python releases for Mac OS X” page. Find the latest python version click on “macOS 64-bit installer” corresponding to the python version.
(OR)
If you want to download the specific version, scroll to down until the tab shown in the below screen shot.
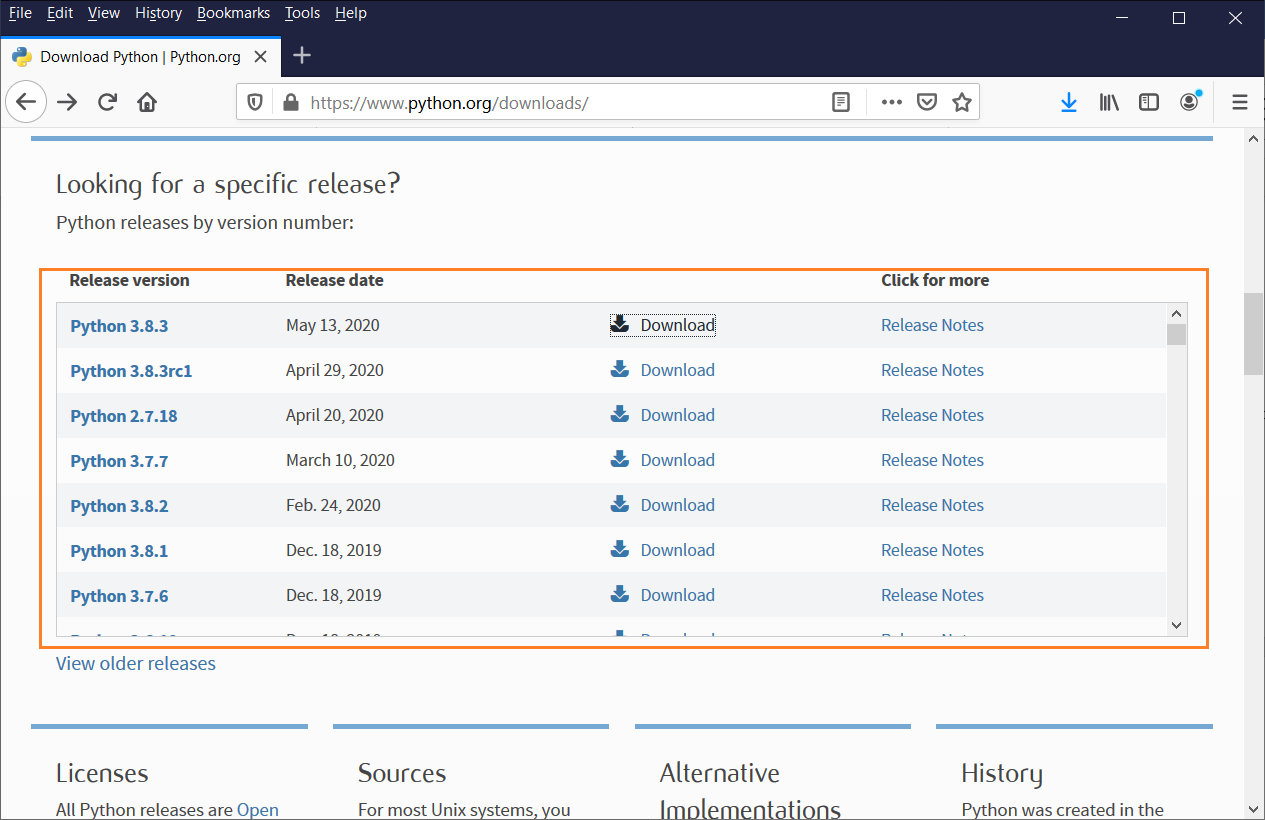
The above tab contains all the versions from 2.0, navigate to the required version and click on “Download”. It navigates to the below page.

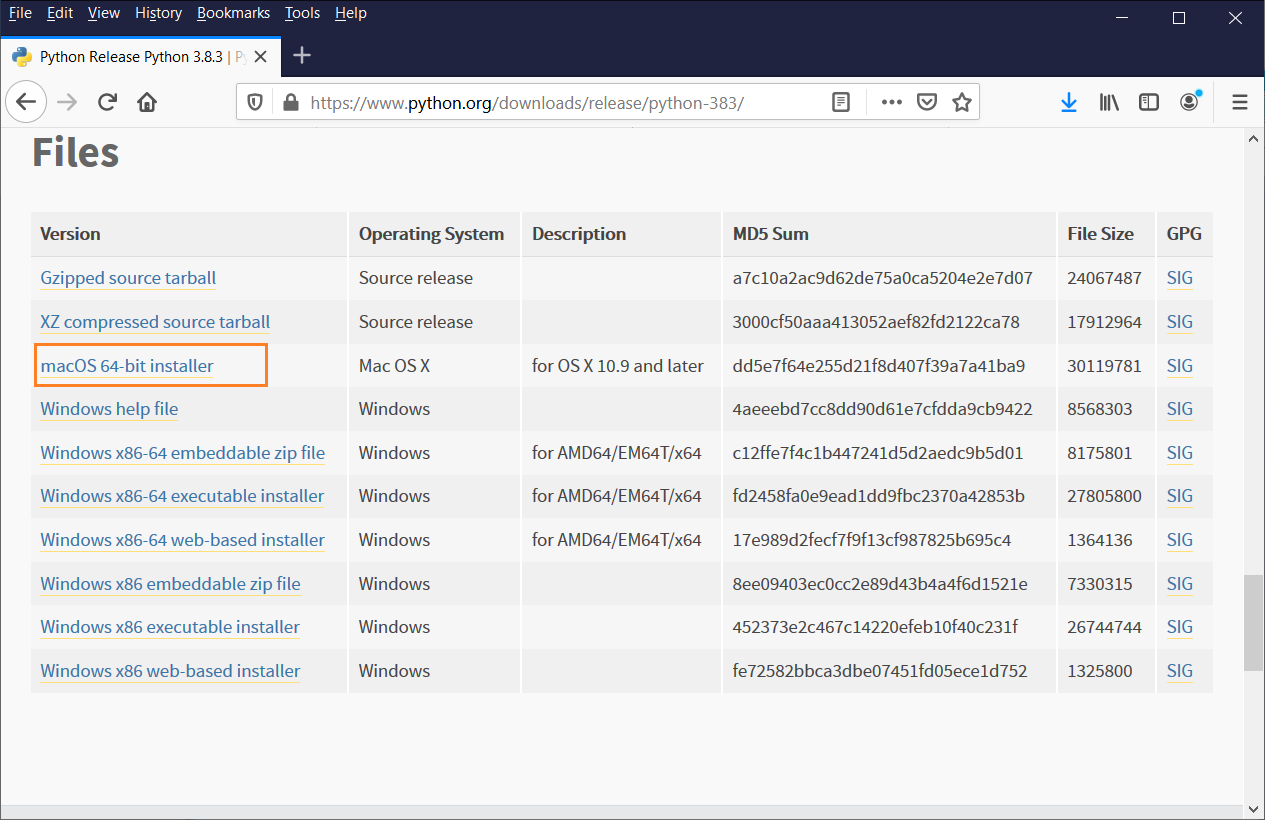
Below highlighted tab displays with the list of different installers for different operating systems. Choose the one which is suitable according to the hardware chipset configuration.
For our case, we are downloading “macOS 64-bit installer” as per my system requirements.
Click on the version to start downloading Python. Python latest version for MacOS got downloaded in the .pkg format. The downloaded file name is “python-3.8.3-macosx10.9.pkg”.
Step2 – Verify the Python version on the system
Use the below command in the python mac terminal to verify the Python version installed on the MacOS.
$ python --version
If it shows the lesser version than the current version, then we need to update the python version to the current latest version.
Step3 – Upgrade to the latest Python version
The current downloaded file is python-3.8.3-macosx10.9.pkg and we can use the same file name in installation command. The command is -
$ sudo installer -pkg downloads/python-3.8.3-macosx10.9.pkg
-target /
The above command syntax for any version is –
$ sudo installer -pkg <download-path>/
<downloaded-pkg-file-name-with-extension>
-target <target-directory>
The above command installs the python 3.8.3 to the directory specified with target option.
Once the installation is successful, it displays “The upgrade was successful”.
Step4 – Verify the Python installation
In Python IDLE terminal, use print command to verify the python successfully installed or not. Here, we are using a print command to display the output.
print(“Welcome to TutorialsCampus”)
If the output gets displayed immediately and command prompt shows again, that confims the python installed successfully on the MacOS. We can start coding of Python language.