
SAP BASIS Configure RFC
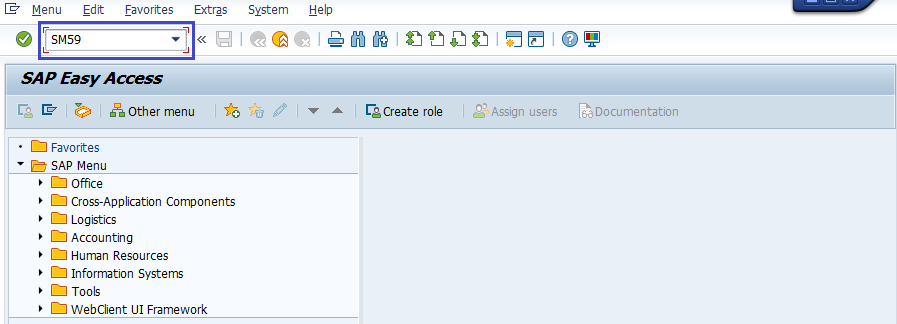
Step-1: Go to SM59 transaction code.
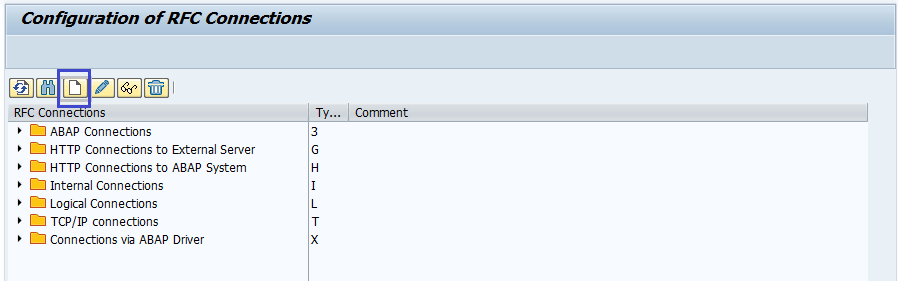
Step-2: It navigates to “Configuration to RFC Connections” Screen. Click on “new” icon to create new connection.
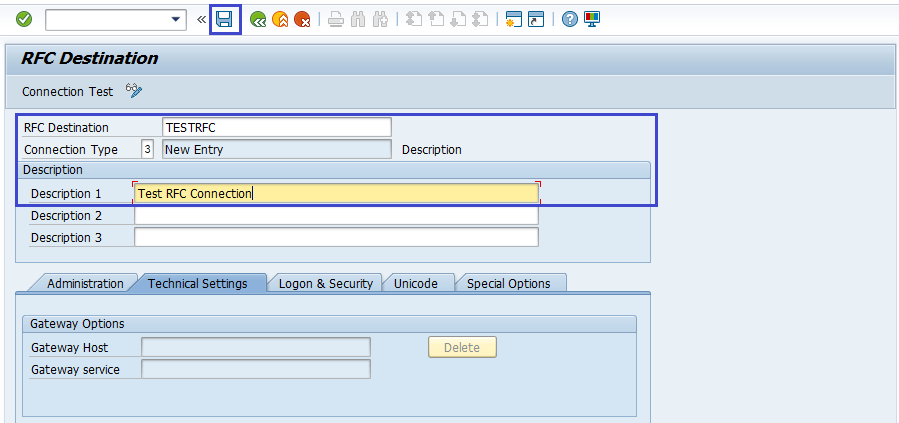
Step-3: Enter RFC destination, connection type and description and click on “save button.
- RFC Destination – Destination/target system ID.
- Connection Type – Select one of the types of RFC connections as per requirement.
- Description – The descriptive information about the RFC connection.
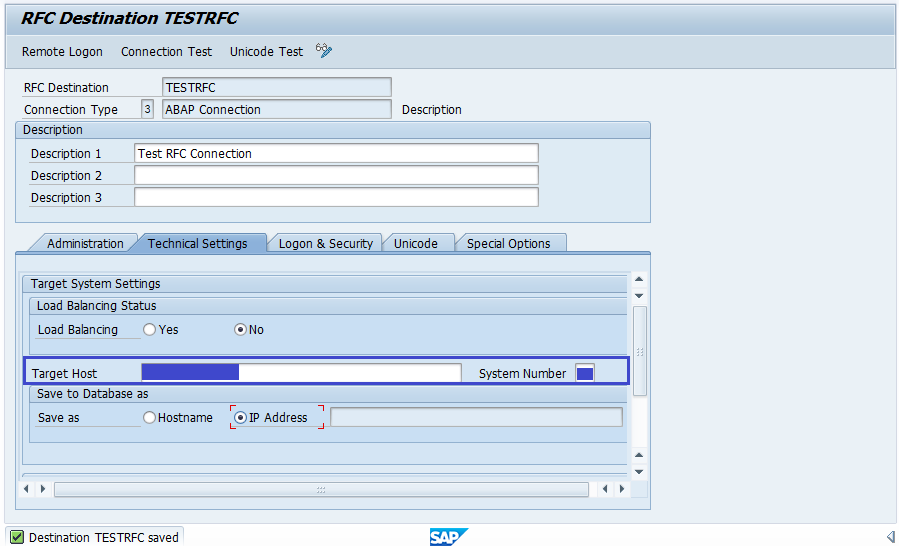
Step-4: “Technical settings” tab opened for edit mode. Enter the target host and system number and click on “Save” button.
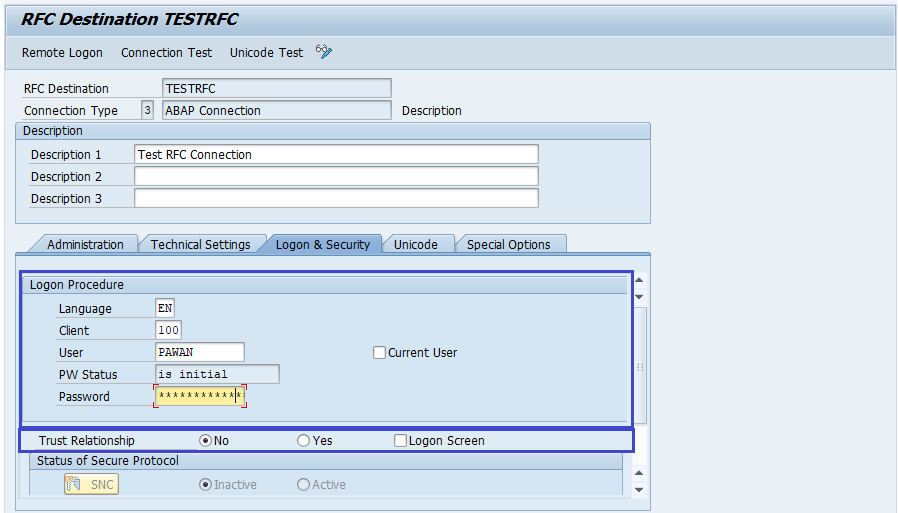
Step-5: Click on “logon & Security” tab, Enter the logon details.
- Language – Specifies the target system's language.
- Client – Specifies the target system's logon client.
- User ID and Password – Specifies the userid and password to login on the target system.
- Trust Relationship – Specifies the connection is trusted or not. If specified as trusted, then opt it as “Yes”.
Step-6: Click on “Save” button. RFC connection is ready to use.
Step-7: Once the RFC established, we need to test the connection is established or not. Click on “Utilities --> Test --> Authorization test”.
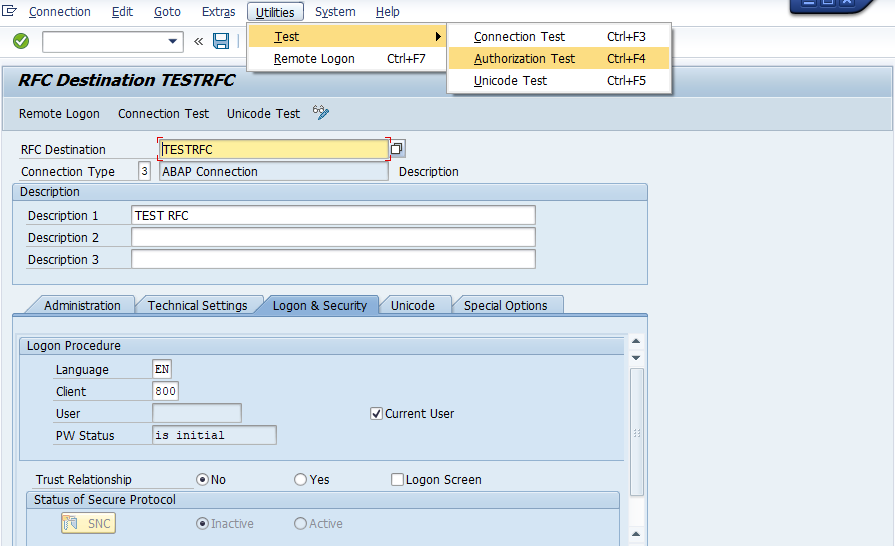
If status bar has no errors, Remote Function Call established successfully.