SQL Install SQL Server
How to install SQL SERVER?
In this topic, we learn about how to install SQL server IN WINDOWS. we can use SQL server with free of cost on our windows server. SQL server has many versions like SQL server 2012, SQL server 2014, SQL server 2016, SQL server 2017, SQL server 2019 etc… Now, we install latest version as SQL server 2019.
SQL Server Installation Process
The installation process is explained as follows step by step -
Step-1: Search for Microsoft SQL server, click on downloads for SQL server. Or else go
https://www.microsoft.com/en-gb/sql-server/sql-server-downloads.By scrolling down, the site available with two standard free editions -
- Developer edition
- Express edition
Now, we install the Developer edition.
Step-2: The window looks like as shown below. Click on "Download now".

Once downloading completed, file available in downloads or your mentioned folder, as SQL2019-SSEI-Dev.
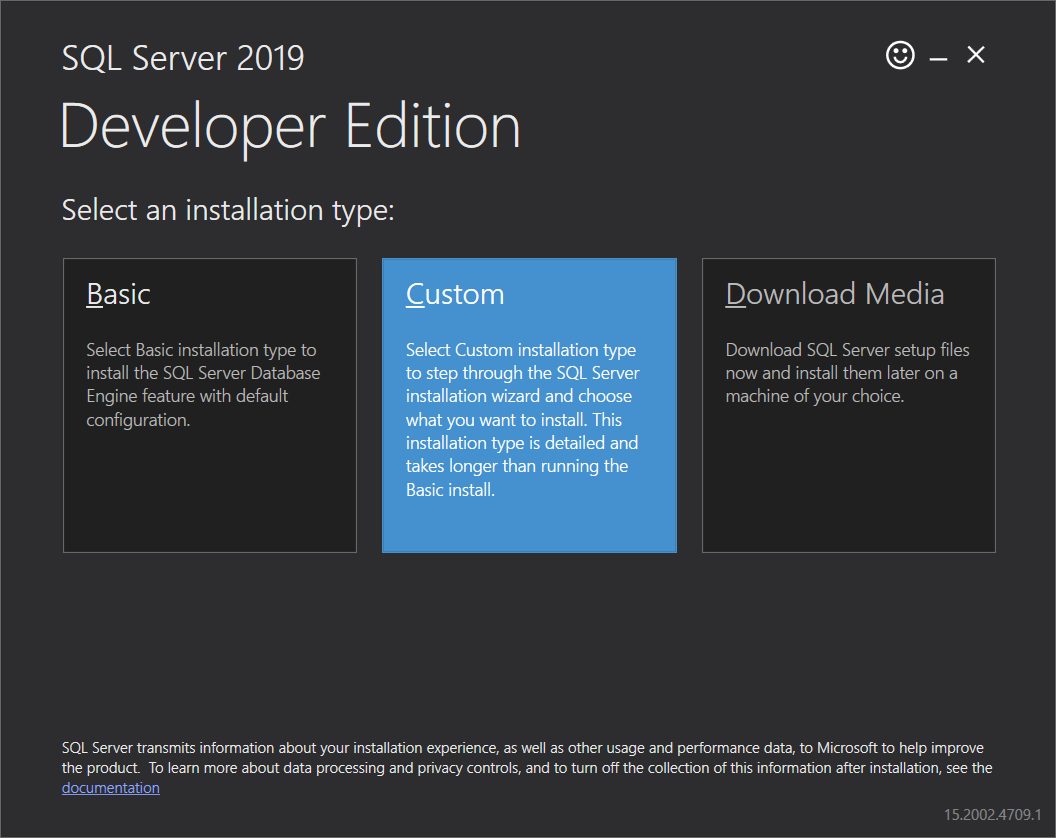
Step-3: click on SQL2019-SSEI-Dev, a new popup gets open with three options like Basic, custom, download media. click on custom, it helps to step through the SQL Server installation wizard and select the features that we want to install.
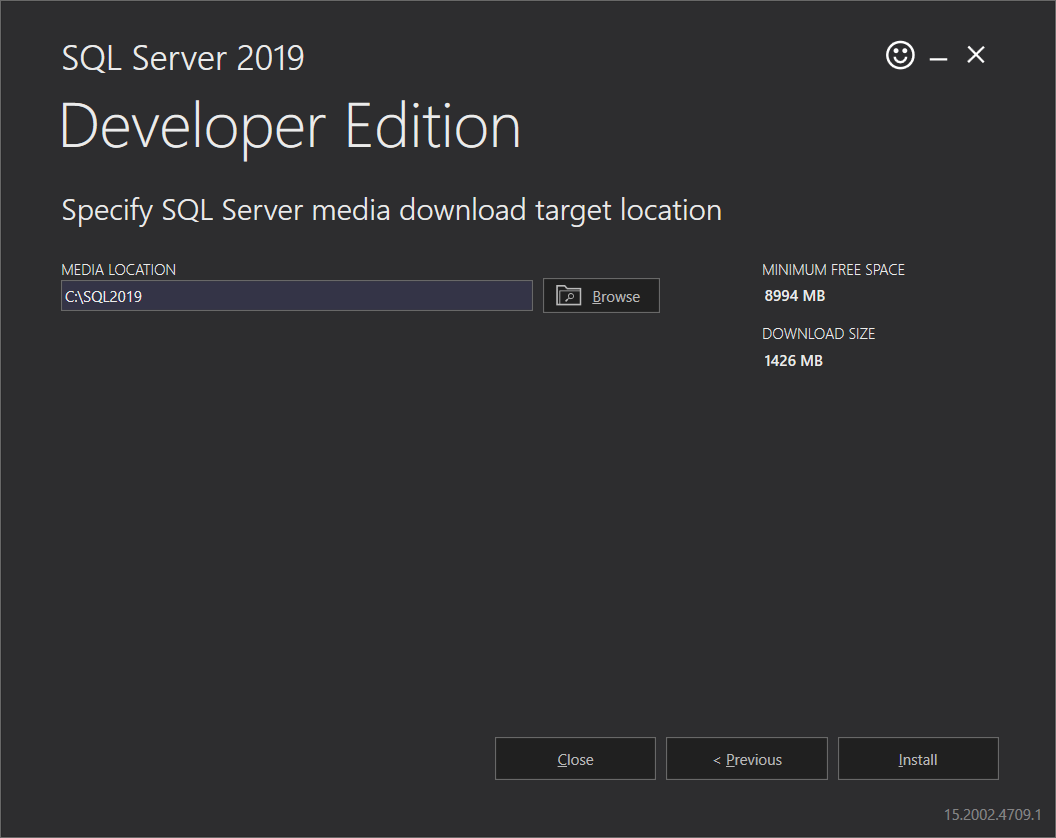
Step-4: A new window will open with default path for developer edition below media location as shown below. We can use default path or our customized path by selecting browse option. Once path is selected, we can click on "install".
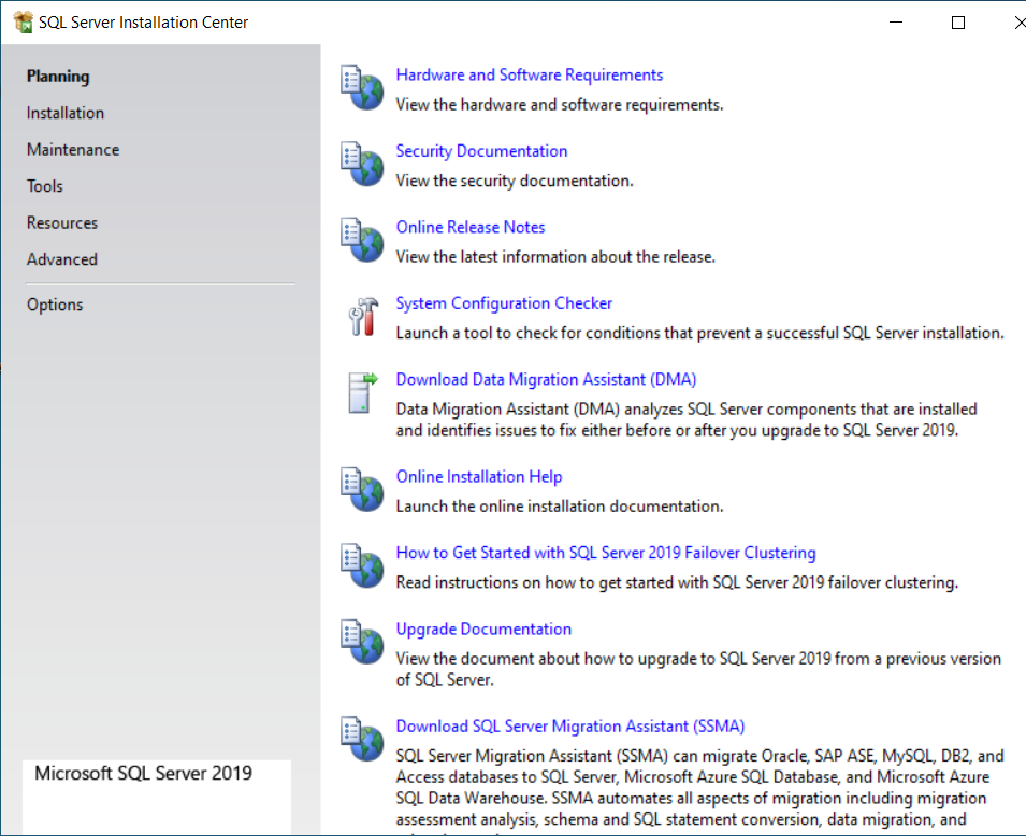
Step-5: It starts downloading for a while. After installing, a pop-up window will come with two columns as shown below. click on "installation" on left side of the column.
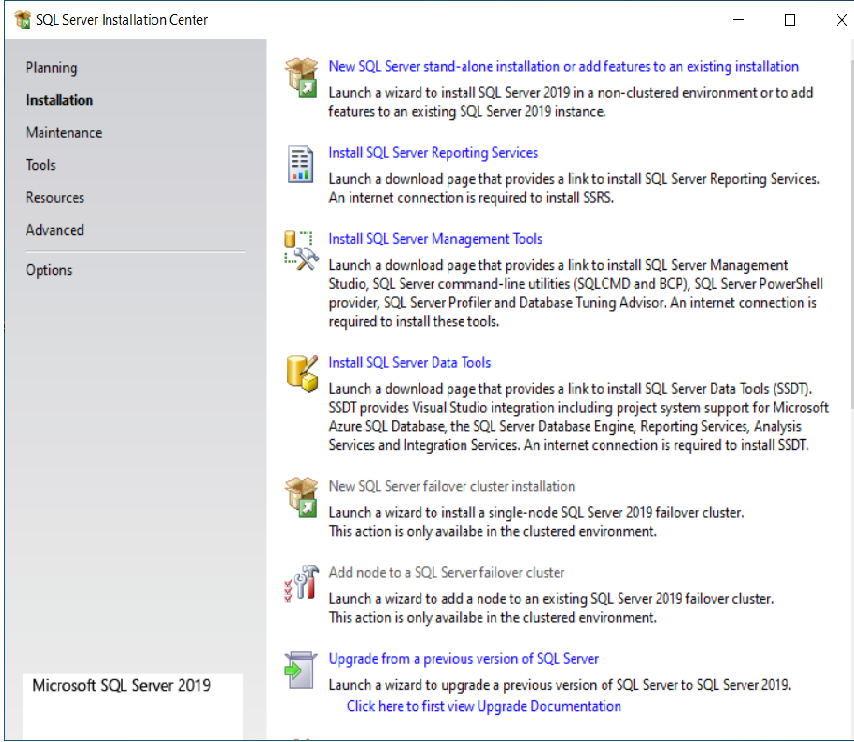
Step-6: Another window will open with different options click on right side first option as New SQL Server stand-alone installation or add features to an existing installation.
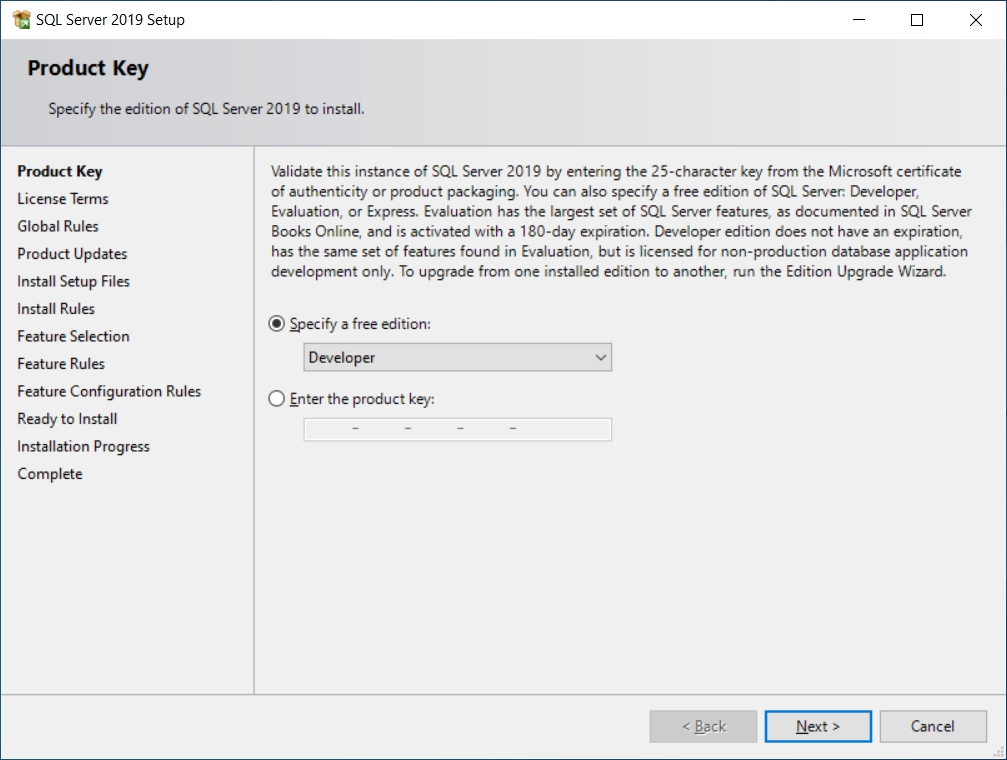
Step-7: Specify the free edition that you want install, click on next.
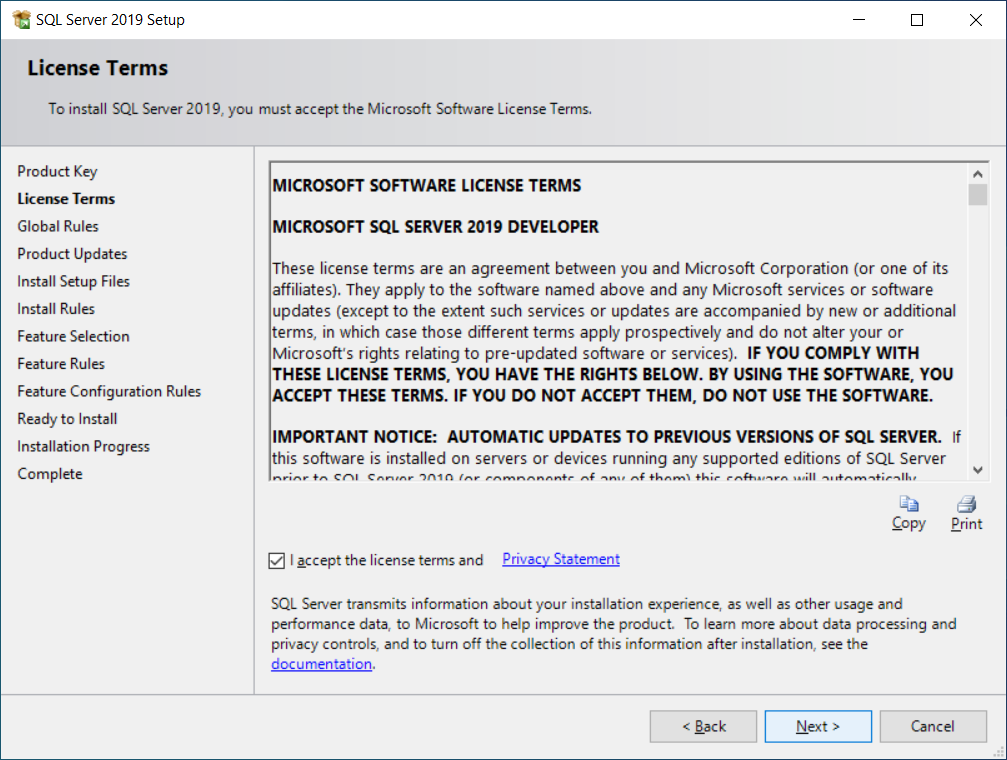
Ste-8: Select the check box "I accept the license terms." and click on Next.
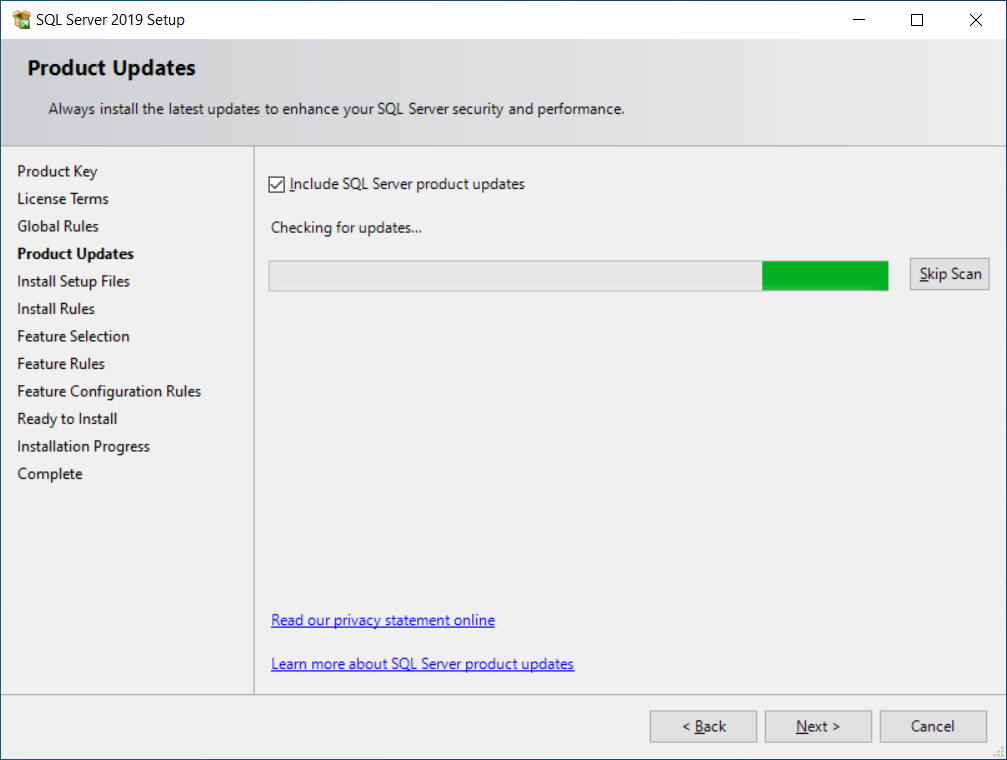
Step-9: Click on Check box "Use Microsoft Update to check for updates (recommended)" to get the security and other important updates for the SQL Server and click the Next button.
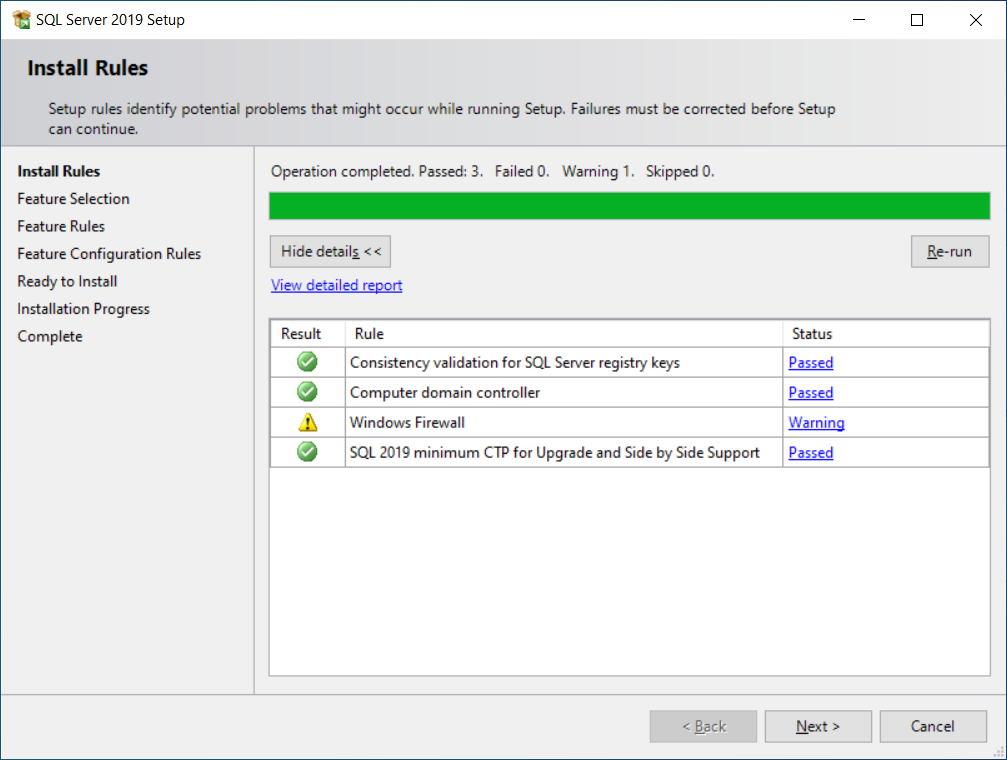
Step-10: Another window gets open if no error occurred. Click on "next".
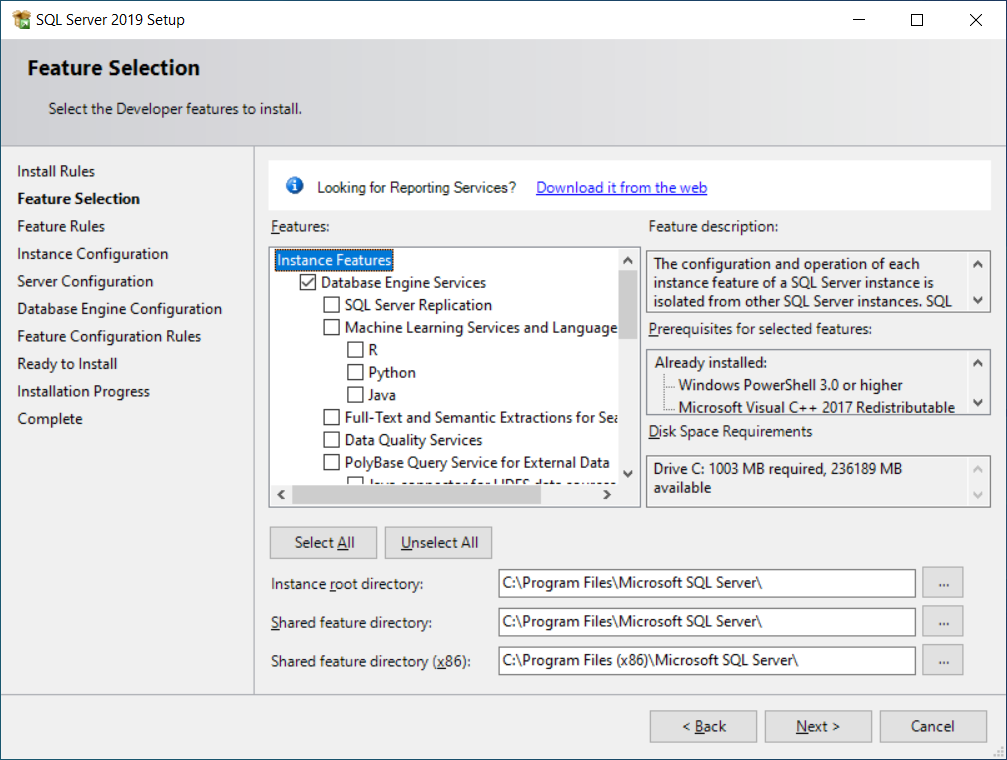
Step-11: Select the features that you want to install. For now, click on check box Database Engine Services, click on Next.
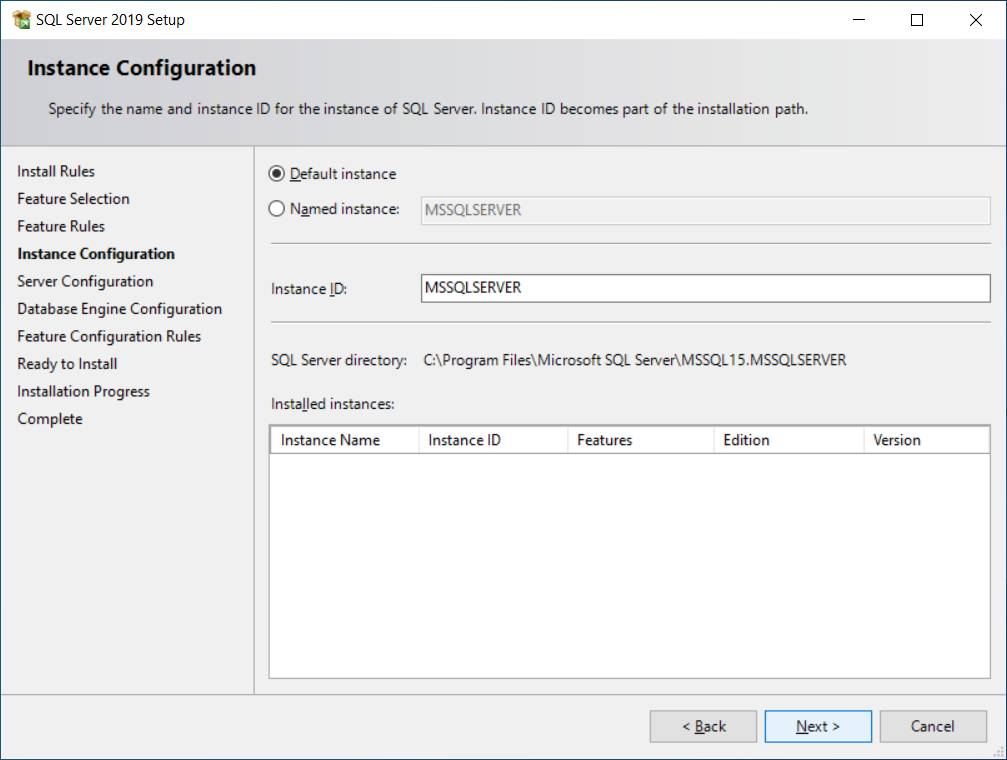
Step-12: Mention the instance name and instance ID for the instance of the SQL Server and click the Next.
Step-13: Next server configuration window will open, in that click on "next".

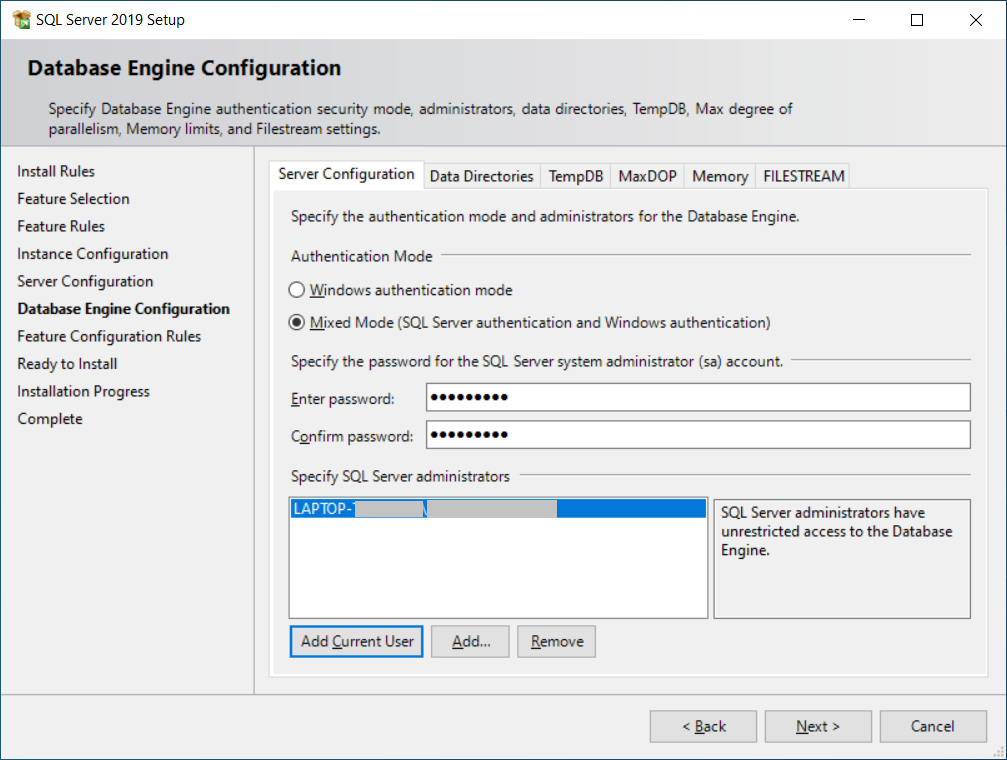
Step-14: Next window will be displayed with two modes, select mixed mode. Now create password for SQL server administrator, re-enter the password for confirmation, and click on "next".
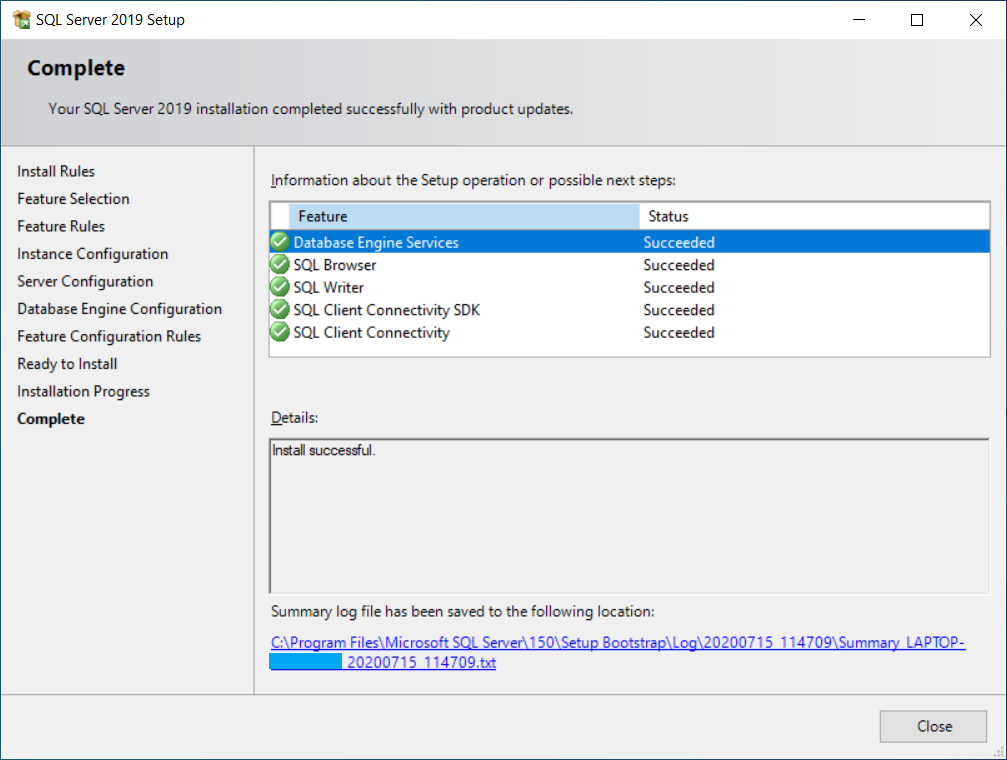
Step-15: Once again check the installed features of SQL server 2019.
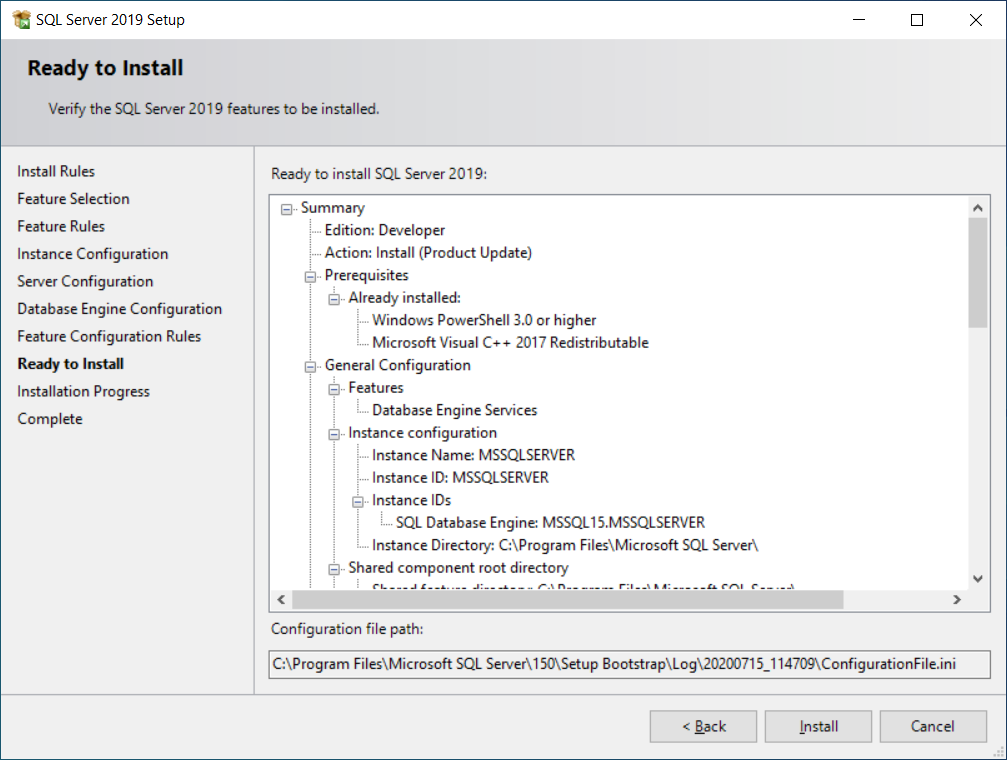
Step-16: The installer starts installing.

Step-17: once installation completed close the window. Now we succesfully installed the SQL server .
Installing SQL Server Management Studio
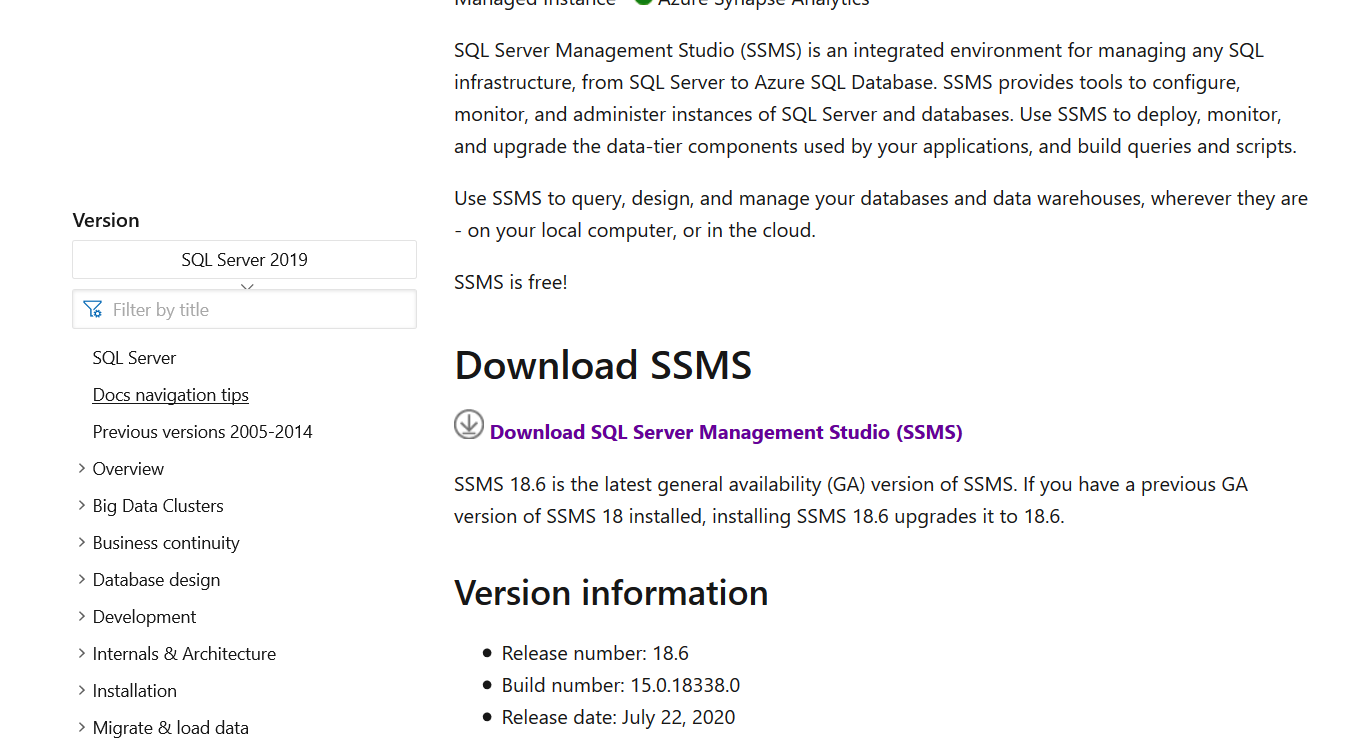
Step-18: Search for SQL Server management studio. click on Download SQL Server Management Studio. Otherwise go Through the URL
https://docs.microsoft.com/en-us/sql/ssms/download-sql-server-management-studio-ssms?view=sql-server-ver15#download-ssms .The Window looks like as shown below.
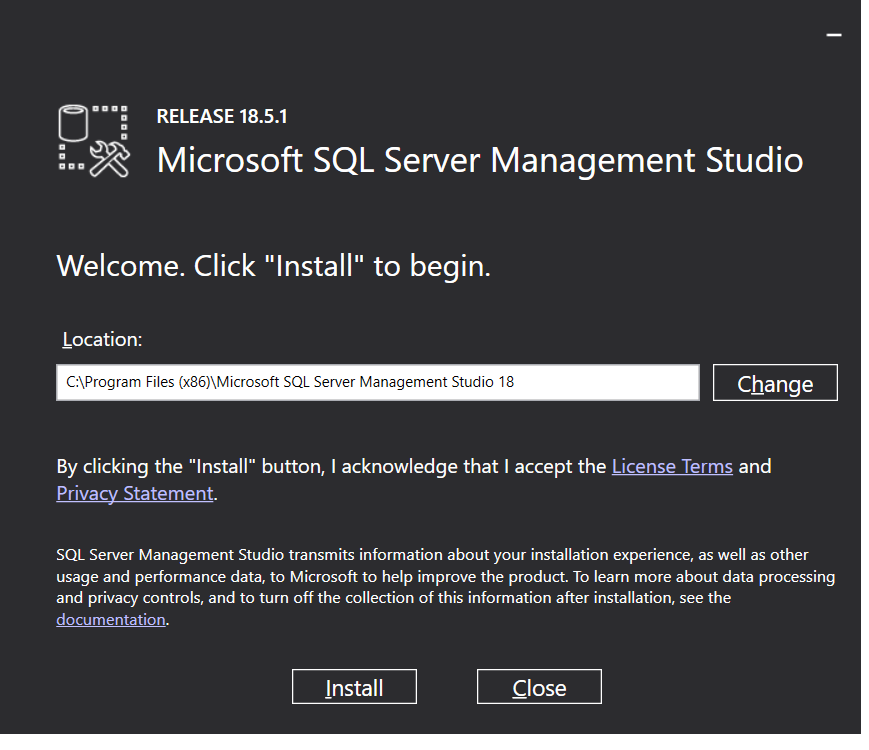
step-19: Once downloading completed, file available in downloads or your mentioned folder, as SSMS-Setup-ENU. Click on SSMS-Setup-ENU a new window will open as shown below. click on install.
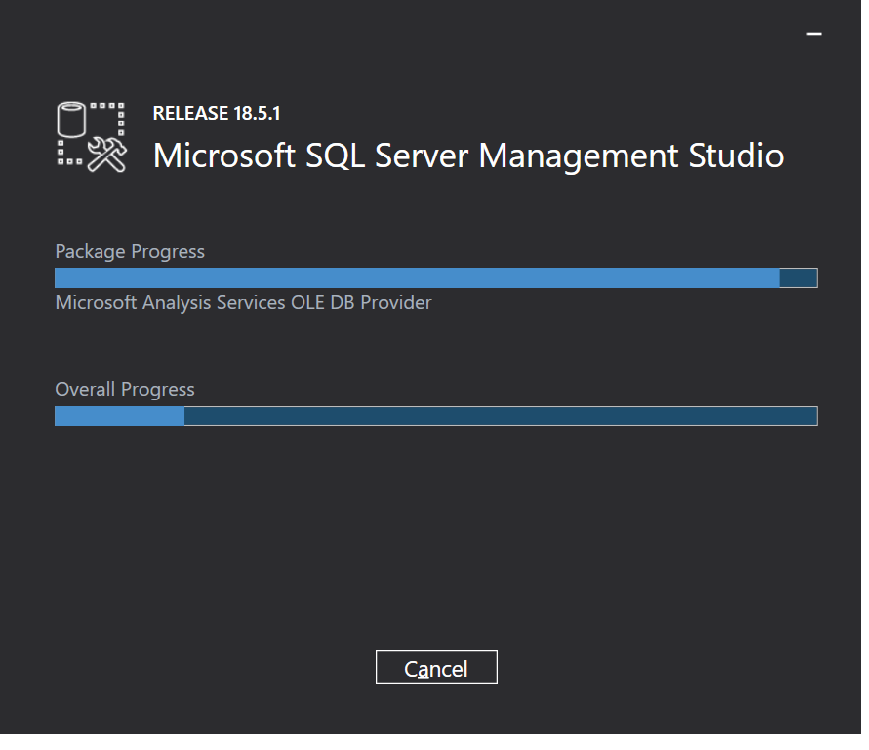
Step-20: Installation started, a new window will open as shown in below
Step-21: When installation completed a new window will open as shown in below :
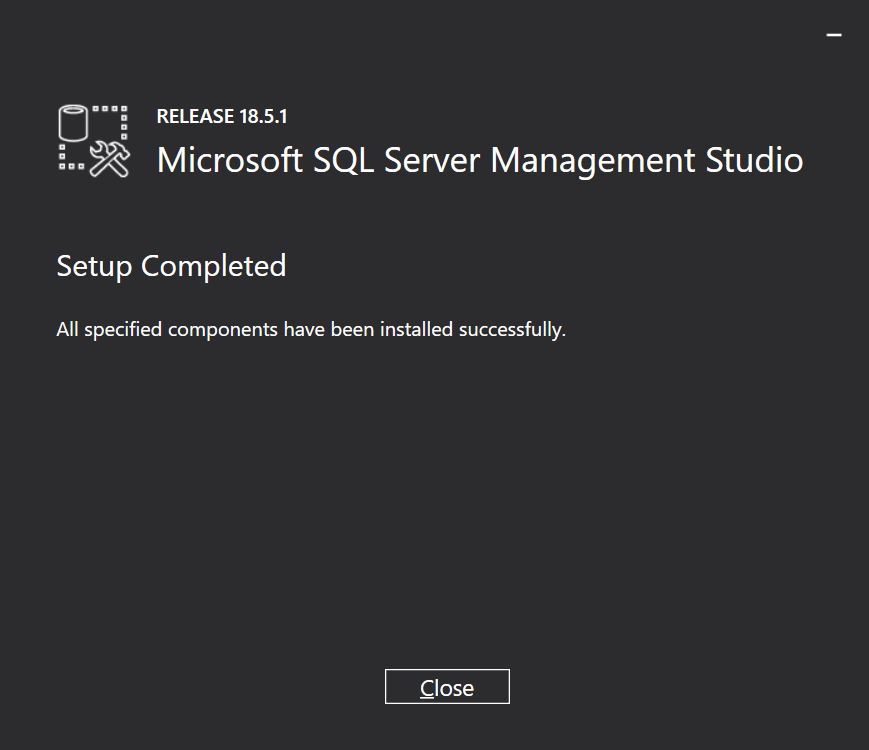
Click on close. Now SQL Server Management Studio installed Successfully.
Step-22: Go to Start menu click on programs click on Microsoft SQL Server Management Studio 18. A new window open as shown in below:

Above window has various fields are explained as follows -
- Server type - User can select one option among five options of MSSQL Service options. In this we use Database Engine to create and working with data. Other server types are Analysis, reporting, integration and Azur SSIS integration runtime.
- Server name - Server name is the name of the where MSSQL Server installed . user need to maintain relationship with server. Generally Server name is machine name\instance name. Instance name is SQL Server instance name while installing SQL Server.
- Authentication - It is default to 'Windows Authentication'.
- Username and Password - No need of username and password while using windows authentication. If we use different authentication then it is necessary.
