
SAP ABAP Lock Objects
What is Lock Objects?
Lock mechanism allows simultaneous accessing of same data records by two or more users at the same time. Functional Modules are responsible for set and release the locks. Function modules are automatically generated from the lock objects definition in the ABAP/4 Dictionary.
When these functional modules are called, the retrived table rows gets locked or unlocked with the definition of certain values to the fields.
Lock objects are used to avoid the inconsistency while accessing the data during its insertion or updation in the database. Tables data records that are required to be locked during its insertion or updation must be defined in a Lock Object with their key fields.
For simplest example, Table with primary key have the lock object because the primary key of the table is the table lock object.
Locking Mode -
Locking mode specifies and controls the data records access level from the several users at the same time. Below is the list of locking modes -
| Lock Modes | Description |
|---|---|
| Exclusive lock | The locked data can be displayed or edited by the user who locked it. Another request for exclusive lock or shared lock is rejected. |
| Shared lock | More than one user can access the locked data at the same time in display mode. Another request for shared lock is accepted and an exclusive lock is rejected. |
| Exclusive but not cumulative | Exclusive locks that are requested several times from the same transaction are processed successively. All other lock requests are rejected. |
Lock Mechanism -
Lock mechanism satisfies below two main functions -
- A program can communicate to the other programs with the data records that are just reading or changing.
- A program can prevent itself from reading data that is just being changed by another program.
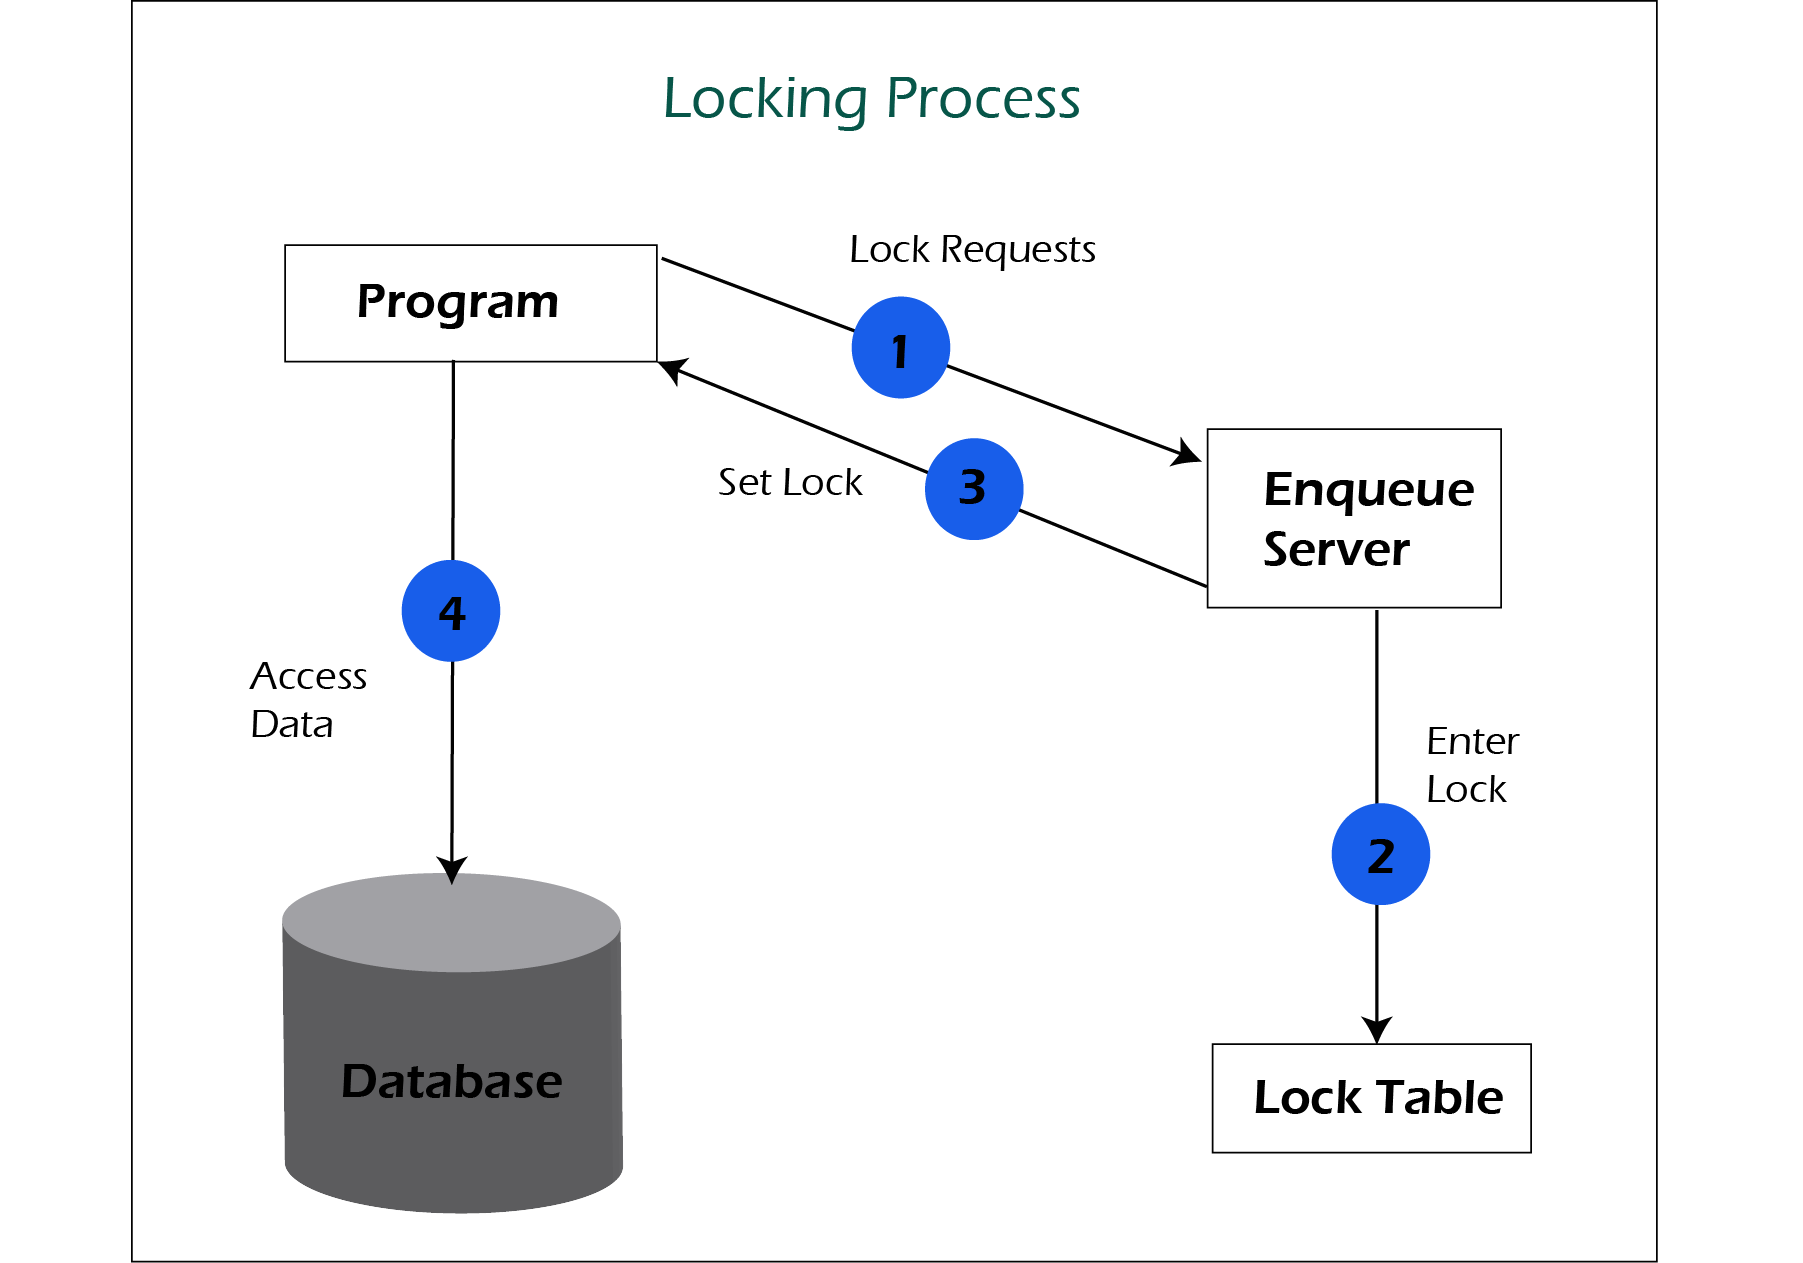
Lock requested from the program and lock request sends to an enqueue server. Enqueue server enters the lock into the lock table and sends the lock set response to program.
Program access the data once the lock set information received from Enqueue server. At the end of the program, program communicates to the enqueue server that releases all the locks. Enqueue server removes the lock entry and releases the lock applied on the data.
Create Lock objects -
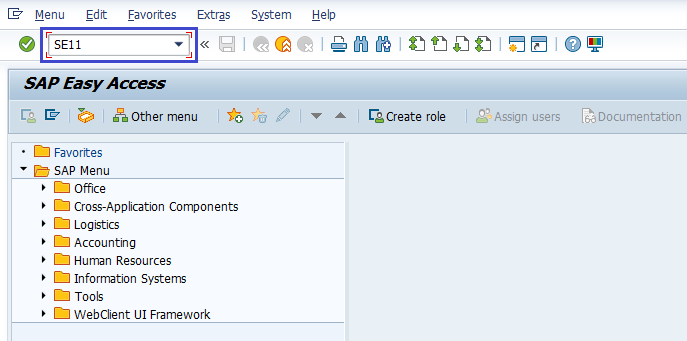
Step-1: Go to SE11 transaction.
Step-2: It opens ABAP Dictionary: Initial Screen. Select Lock object radio button and enter the lock object name. Click on "Create" button.

Step-3: It opens Dictionary: Change Lock Object screen.
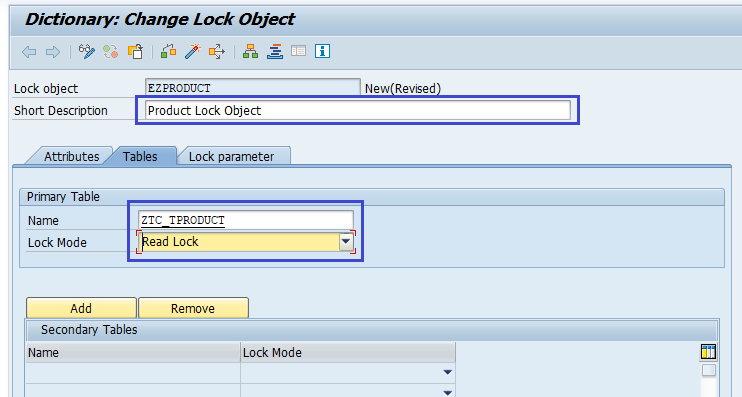
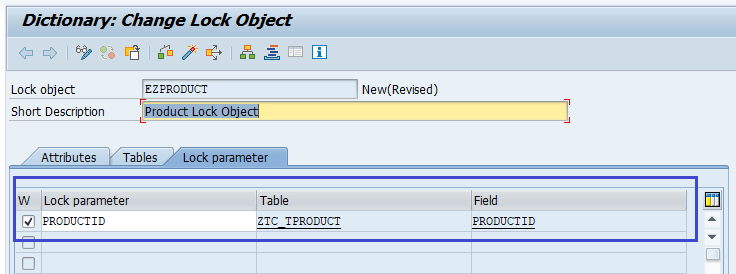
Step-4: Open Lock parameter tab and check the table primary key added automatically or not. If added, click on (Ctrl + S) or "Save" icon to save Lock object.
Step-5: It asks for the package by opening a new dialogue box. System asks for the package. Enter existing package if any, or create new package.
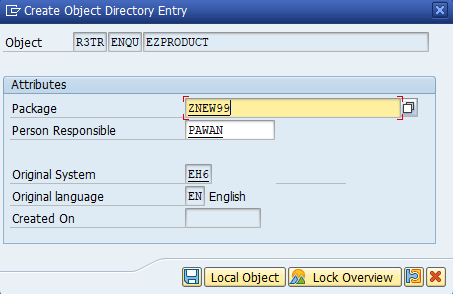
Once the package information entered, click on "Local object" (if it is a local lock object and non transportable object) or "Save" to create the lock object.
Step-6: Once the Lock Object saved successfully, the "EZPRODUCT saved" message displayed on status bar.

Step-7: Click on "Activate" icon or "Ctrl +F3" to activate Lock Object. If the Lock Object activated successfully, the "Object Activated" message displayed on status bar like below.

Lock Object is now activated and ready to use. If error messages or warnings occurred during the activation of the Lock Object, the activation log is displayed automatically. The same activation log can navigate through menu option Utilities(M) → Activation log.
Step-8: Once the Lock Object activated, two function modules are generated. To check function modules, navigate Go TO Lock Modules. It opens the below screen.
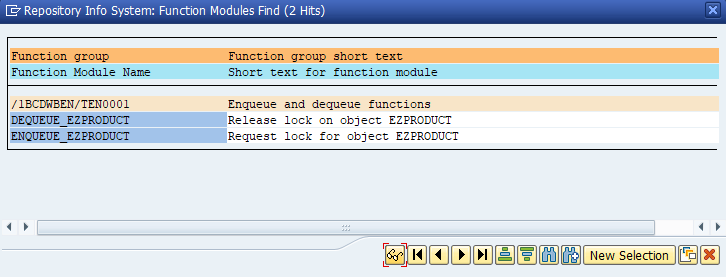
DEQUEUE_EZPRODUCT and ENQUEUE_EZPRODUCT are the two function modules generated. The table key field included in the lock object called as lock arguments. These lock arguments are used as input parameters to set or release the locks generated in function modules.
Change Lock objects -
If any Lock Object information updated wrongly, Lock Object definition needs to be changed. Change option is used to change the Lock Object properties and follow the below steps to change the Lock Object definition -
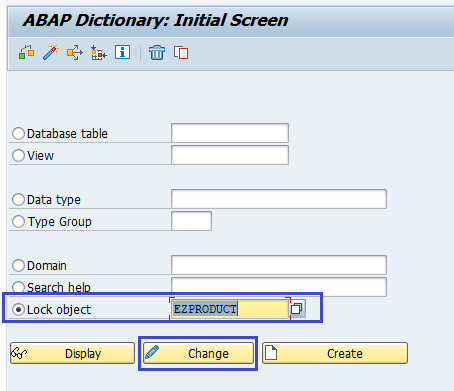
Step-1: Go to SE11 transaction.
Step-2: It opens ABAP Dictionary: Initial Screen. Enter the Lock Object name and click on the "Change" icon.
Step-3: Click on "Save" once the information modified. Verify the below message gets displayed on status bar.
Step-4: Click on "Activate" icon or "Ctrl +F3" to activate the new changes of the lock objects. Verify the below message gets displayed on status bar.
Delete Lock object -
If we want to delete the existing lock object or a lock object is wrongly created, follow the below steps to delete lock object.
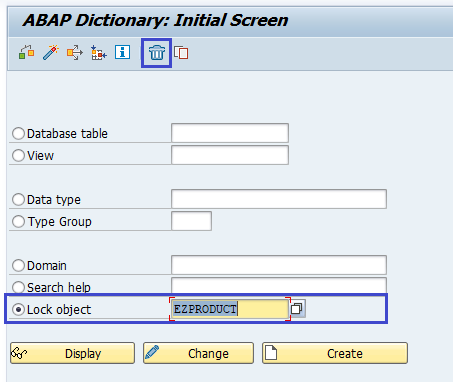
Step-1: Go to SE11 transaction.
Step-2: It opens ABAP Dictionary: Initial Screen. Enter the Lock object name and click on the "delete" icon.
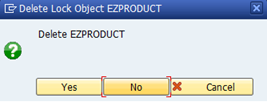
It displays a "Delete Lock object" popup for confirmation, click on "Yes" to delete the Lock Object.
Once the Lock Object successfully deleted, the below message displays on status bar.
